
Florence Blogspot about asp.net tutorials and web design and web development

Thursday, December 18, 2008
Preventing Caching of htm and images being stored in Client Machine
Preventing Caching of htm and images being stored in Client Machine in Temporaray Internet Files.
Open IIS by:
1. Go to START-->RUN-->Type inetmgr
2. Click Website/Default Web Site.
3.Select Properties by Right Clicking your Virtual Directory Ex: TestApp.
4.In the Properties Dialog Box, Select HTTP Header Tab.
5.In the Custom HTTP Header Column, Click Add Button.
6. It will open another dialog box.
7. In the Add/Edit Custom HTTP Header.
1.Type "cache-control" in Header Name and
2.Type "no-cache" in Header Value
3.Click Ok
8.Again In the Add/Edit Custom HTTP Header.
1.Type "programa" in Header Name and
2.Type "no-cache" in Header Value
3.Click Ok
9.Click ok in all dialog boxes and exit from IIS.
Now check your cache in Temporary Internet Files folder.
No no no no no cache..................rit...........
How is it!!!!!!!! Coo000000000l............
Sunday, November 23, 2008
Generating pdf report using asp.net
PDF analysis by Florence.D
I have found some free components for generating pdf report using asp.net
iTextSharp.dll
ghtml2Pdf.exe
PDFSharp.dll
ApacheFop.net.dll
But I found some difficulty in the above components :
iTextSharp.dll:
In iTextSharp,
we can use 2 methods here
By passing the whole html script as string
by create a table in the code behind.
Our requirement is to generate the 1000 lines of html script into pdf.
So it is high risk to pass the 1000 lines of html script into string and also in the code behind it is not possible to create a each table in the code behind because every time the script generated may vary..
Only we can create a simple pdf not complex html scripts.
We cannot write the 1000 lines of html script into iTextSharp.dll.
ghtml2Pdf.exe:
Here we are using the exe component to generate the pdf file by passing the html file.
We have to generate the html file first and then pass that file into ghtml2Pdf.exe.
It is high riskable in the dotnet framework. Morever the we cannot use this in our whole servers.
It has the rights to work in only limited number of computers.
PDFSharp.dll
Here again we cannot use the html scripts to generate the pdf.
We have to create our own design in the codebehind. Again the same problem that every time the design or the html script may vary according to the report generated.
ApacheFop.net.dll
This is the good method to generate the pdf in dotnet using java classes.
Also we need vjslib.dll to work with the Java classess.
The process is some wat critical.
First we have to create a xml file to store the datas needed.
Then we have to create a design pattern like stylesheet using xsl.
After creating the xml and xsl, we have to transform these two and need to generate the fo file ie Formatted object file.
After the fo file created , we can generate the pdf from the fo file.
This is the structure.
But this requires some amount of time.
Using Java:
http://www.javaworld.com/javaworld/jw-04-2006/jw-0410-html.html
Here is the link where I read article for generating pdf using java.
It is a difficult process same as the above one.
Conclusion.
I have found lot of premium shareware components to generate the pdf from html.
It average costs from 600 to 1000 $.
The best is
www.winnovative-software.com
http://www.winnovative-software.com/Buy.aspx#redistributable
cost for redistributable pacakage is
INR 33938.41
Some other premium components
http://www.html-to-pdf.net/Pricing.aspx
Hope all got some knowledge anyone who started creating pdf.
http://www.winnovative-software.com/Buy.aspx#redistributable
cost for redistributable pacakage is
INR 33938.41
Some other premium components
http://www.html-to-pdf.net/Pricing.aspx
Hope all got some knowledge anyone who started creating pdf.

Monday, August 11, 2008
Yahoo contacts!!! import class in C#
I tried to find free Yahoo! Contact import code for .NET platform. I found only paid packages for 300+$.
I've implemented importing and you can use it for free.
(But you need to make some change in code to compile it)
using System;
using System.Collections.Specialized;
using System.Net;
using System.Text;
using System.Text.RegularExpressions;
namespace Gnilly.Syndication.Mail
{
public class YahooExtract
{
private const string _addressBookUrl = "http://address.yahoo.com/yab/us/Yahoo_ab.csv?loc=us&.rand=1671497644&A=H&Yahoo_ab.csv";
private const string _authUrl = "https://login.yahoo.com/config/login?"; private const string _loginPage = "https://login.yahoo.com/config/login";
private const string _userAgent = "Mozilla/5.0 (Windows; U; Windows NT 5.1; en-US; rv:1.8.1.3) Gecko/20070309 Firefox/2.0.0.3";
public bool Extract( NetworkCredential credential, out MailContactList list )
{
bool result = false;
list = new MailContactList();
try
{
WebClient webClient = new WebClient(); webClient.Headers[ HttpRequestHeader.UserAgent ] = _userAgent; webClient.Encoding = Encoding.UTF8;
byte[] firstResponse = webClient.DownloadData( _loginPage );
string firstRes = Encoding.UTF8.GetString( firstResponse );
NameValueCollection postToLogin = new NameValueCollection();
Regex regex = new Regex( "type=\"hidden\" name=\"(.*?)\" value=\"(.*?)\"", RegexOptions.IgnoreCase );
Match match = regex.Match( firstRes );
while ( match.Success )
{
if ( match.Groups[ 0 ].Value.Length > 0 )
{
postToLogin.Add( match.Groups[ 1 ].Value, match.Groups[ 2 ].Value );
}
match = regex.Match( firstRes, match.Index + match.Length );
}
postToLogin.Add( ".save", "Sign In" );
postToLogin.Add( ".persistent", "y" );
string login = credential.UserName.Split( '@' )[ 0 ];
postToLogin.Add( "login", login );
postToLogin.Add( "passwd", credential.Password );
webClient.Headers[ HttpRequestHeader.UserAgent ] = _userAgent;
webClient.Headers[ HttpRequestHeader.Referer ] = _loginPage;
webClient.Encoding = Encoding.UTF8;
webClient.Headers[ HttpRequestHeader.Cookie ] = webClient.ResponseHeaders[ HttpResponseHeader.SetCookie ];
webClient.UploadValues( _authUrl, postToLogin );
string cookie = webClient.ResponseHeaders[ HttpResponseHeader.SetCookie ];
if ( string.IsNullOrEmpty( cookie ) )
{
return false;
}
string newCookie = string.Empty;
string[] tmp1 = cookie.Split( ',' );
foreach ( string var in tmp1 )
{
string[] tmp2 = var.Split( ';' );
newCookie = String.IsNullOrEmpty( newCookie ) ? tmp2[ 0 ] : newCookie + ";" + tmp2[ 0 ];
}
// set login cookie
webClient.Headers[ HttpRequestHeader.Cookie ] = newCookie;
byte[] thirdResponse = webClient.DownloadData( _addressBookUrl );
string thirdRes = Encoding.UTF8.GetString( thirdResponse );
string crumb = string.Empty;
Regex regexCrumb = new Regex( "type=\"hidden\" name=\"file://.crumb/" id=\"crumb1\" value=\"(.*?)\"", RegexOptions.IgnoreCase );
match = regexCrumb.Match( thirdRes );
if ( match.Success && match.Groups[ 0 ].Value.Length >) )
{
crumb = match.Groups[ 1 ].Value;
}
NameValueCollection postDataAB = new NameValueCollection();
postDataAB.Add( ".crumb", crumb );
postDataAB.Add( "vcp", "import_export" );
postDataAB.Add( "submit[action_export_yahoo]", "Export Now" );
webClient.Headers[ HttpRequestHeader.UserAgent ] = _userAgent;
webClient.Headers[ HttpRequestHeader.Referer ] = _addressBookUrl;
byte[] FourResponse = webClient.UploadValues( _addressBookUrl, postDataAB );
string csvData = Encoding.UTF8.GetString( FourResponse );
string[] lines = csvData.Split( '\n' ); foreach ( string line in lines )
{
string[] items = line.Split( ',' );
if ( items.Length < 5 )
{ continue;
}
string email = items[ 4 ];
string name = items[ 3 ];
if ( !string.IsNullOrEmpty( email ) && !string.IsNullOrEmpty( name ) )
{
email = email.Trim( '\"' );
name = name.Trim( '\"' );
if ( !email.Equals( "Email" ) && !name.Equals( "Nickname" ) )
{
MailContact mailContact = new MailContact();
mailContact.Name = name;
mailContact.Email = email;
list.Add( mailContact );
}
}
}
result = true;
}
catch
{
}
return result;
}
}
}
Sunday, July 27, 2008
Adding google MAP into your .NET website in just 15 minutes
Adding GOOGLE MAP into your .NET website in just 15 minutes by Florence
Ever wanted to add a Google Map to your site but only had 15 minutes to spare? Now you can add a map and still have time to brag to your mates and bask in the worship that (inevitably) comes afterward. Basically, the guys over at subgurim.net have already done all the hard work in writing the .Net wrapper for Google Maps. Problem is, the examples on their site are mostly in spanish & its a bit difficult to find out exactly what is needed to get everything working. But all this is cutting into your bragging time - so lets get started!
1. Get a Google Maps API key from here:http://www.google.com/apis/maps/
2. Download the SubGurim wrapper dll from here:http://en.googlemaps.subgurim.net/descargar.aspx
3. Unzip it, and put it in your \bin directory
4. Add it to your toolbox byTools -> Choose Toolbox Items -> Browse -> Select the .dll file -> OKGMap will now be in the ‘Standard’ area of your Toolbox.
5. Add a new webpage. 6. Drag the GMap from the toolbox onto the page. A new instance of the GMap will appear on the page, with the name ‘GMap1′
7. Add the following lines to your web.config file: appsettings add value="YourGoogleMapsAPIKeyHere" key="googlemaps.subgurim.net" appsettings 8. Add the following code to your Page.Load sub
Dim sStreetAddress As String Dim sMapKey As String = ConfigurationManager.AppSettings("googlemaps.subgurim.net") Dim GeoCode As Subgurim.Controles.GeoCode sStreetAddress = "100 Russell St. Melbourne. VIC. 3000. Australia" GeoCode = GMap1.geoCodeRequest(sStreetAddress, sMapKey) Dim gLatLng As New Subgurim.Controles.GLatLng(GeoCode.Placemark.coordinates.lat, GeoCode.Placemark.coordinates.lng) GMap1.setCenter(gLatLng, 16, Subgurim.Controles.GMapType.GTypes.Normal) Dim oMarker As New Subgurim.Controles.GMarker(gLatLng) GMap1.addGMarker(oMarker)
Press F5, and start basking in the glory!
Friday, July 11, 2008
VB.NET and C# Programming Basics
VB.NET and C# are great programming languages because they offer a structured way of programming. By structured, I mean that code is separated into modules,
where each module defines classes that can be imported and used in other modules. Both languages are relatively simple to get started with, yet offer features sophisticated enough for complex, large-scale enterprise applications.
Each language's ability to support more complex applications (its scalability) stems from the fact that it is an object-oriented programming (OOP) language. But ask seasoned developers what OOP really is, and they'll start throwing out buzzwords and catchphrases that are sure to confuse you - terms like polymorphism, inheritance, and encapsulation. In this article I'm going to explain the fundamentals of OOP and how good OOP style can help you develop better, more versatile Web applications down the road. This article will provide a basic OOP foundation that targets Web developers. In particular, we'll cover the following concepts:
Objects
Properties
Methods
Classes
Scope
Events
Inheritance
Objects
In OOP, one thinks of programming problems in terms of objects, properties, and methods. The best way to get a handle on these terms is to consider a real-world object and show how it might be represented in an OOP program. Many books use the example of a car to introduce OOP. I'll try to avoid that analogy and use something friendlier: my dog, an Australian Shepherd named Rayne.
Rayne is your average great, big, friendly, loving, playful mutt. You might describe him in terms of his physical properties: he's gray, white, brown, and black, stands roughly one and a half feet high, and is about three feet long. You might also describe some methods to make him do things: he sits when he hears the command "Sit," lies down when he hears the command "Lie down," and comes when his name is called.
So, if we were to represent Rayne in an OOP program, we'd probably start by creating a class called Dog. A class describes how certain types of objects look from a programming point of view. When we define a class, we must define the following two things:
Properties. Properties hold specific information relevant to that class of object. You can think of properties as characteristics of the objects that they represent. Our Dog class might have properties such as Color, Height, and Length.
Methods. Methods are actions that objects of the class can be told to perform. Methods are subroutines (if they don't return a value) or functions (if they do) that are specific to a given class. So the Dog class could have methods such as sit and lie_down.
Once we've defined a class, we can write code that creates objects of that class, using the class a little like a template. This means that objects of a particular class expose (or make available) the methods and properties defined by that class. So, we might create an instance of our Dog class called Rayne, set its properties accordingly, and use the methods defined by the class to interact with Rayne, as shown in Figure 1.
Figure 1: The methods defined by the class interact with the object.
This is just a simple example to help you visualize what OOP is all about. In the next few sections, we'll cover properties and methods in greater detail, and talk about classes and class instances, scope, events, and even inheritance.
Properties
As we've seen, properties are characteristics shared by all objects of a particular class. In the case of our example, the following properties might be used to describe any given dog:
Color
Height
Length
In the same way, the more useful ASP.NET Button class exposes properties, including:
Width
Height
ID
Text
ForeColor
BackColor
Unfortunately for me, if I get sick of Rayne's color, I can't change it. ASP.NET objects, on the other hand, let us change their properties very easily in the same way that we set variables. For instance, we've already used properties when setting text for the Label control, which is actually an object of the Label class in the System.Web.UI.WebControls namespace:
(VB.NET)
lblMyText.Text = "Hello World"
(C#)
lblMyText.Text = "Hello World";
In this example we're using a Label control called lblMyText. Remember, ASP.NET is all about controls, and, as it's built on OOP, all control types are represented as classes. In fact, all interaction with ASP.NET pages is handled via controls. When we place a control on a page, we give it a name through its id attribute, and this ID then serves as the name of the control. Rayne is an object. His name, or ID, is Rayne. Rayne has a height of 18. The same holds true for the Label control. The Label control's name or ID in the previous example is lblMyText. Next, we use the dot operator (.) to access the Text property that the object exposes and set it to the string "Hello World."
Methods
With our dog example, we can make a particular dog do things by calling commands. If I want Rayne to sit, I tell him to sit. If I want Rayne to lie down, I tell him to lie down. In object-oriented terms, I tell him what I want him to do by calling a predefined command or method, and a resulting action is performed. In VB.NET or C#, we would write this as rayne.Sit, or rayne.LieDown.
As Web developers, we frequently call methods when a given event occurs. For instance, we can take information from an Access database and create an object called objConn to represent the connection to the database. We then open the connection by calling the Open method on that object as follows:
(VB.NET)
Dim objConn As New OleDbConnection( _
"Provider=Microsoft.Jet.OLEDB.4.0;" & _
"Data Source=C:\Database\books.mdb")
...
objConn.Open()
We say that the Open method is exposed by the connection object, and that we're calling the Open method on the OleDbConnection object stored in objConn. We don't need to know what dark secrets the method uses to do its magic; all we need to know is its name and its purpose.
Classes
You can think of a class as a template for building as many objects as you like of a particular type. When you create an instance of a class, you are creating an object of that class, and the new object has all the characteristics and behaviors (properties and methods) defined by the class.
In our dog example, Rayne was an instance of the Dog class, as shown in Figure 2.
Figure 2: A class serves as the blueprint for an object.
We see that Rayne is an object of class Dog. In our code, we could create a new instance of the Dog class, call it rayne, and use all the properties and methods exposed by the object.
In OOP, when we create new instances of a class, we say we're instantiating that class. For instance (no pun intended!), if we need to programmatically create a new instance of the Button control class, we could write the following code:
(VB.NET)
Dim myButton As New Button()
(C#)
Button myButton = new Button();
As you can see, we've essentially created a new object called myButton from the Button class. We can then access the properties and methods that Button exposes through our new instance:
(VB.NET)
myButton.Text = "Click Me!"
(C#)
myButton.Text = "Click Me!";
Scope
You should now have a concept of programming objects as entities that exist in a program and are manipulated through the methods and properties they expose. However, in some cases, we want to create methods to use inside our class, which are not available when that class is used in code. Let's return to the Dog class to illustrate this concept.
Imagine we're writing the Sit method inside this class, and we realize that before the dog can sit, it has to shuffle its back paws forward a little (bear with me on this one). We could create a method called ShufflePaws, then call that method from inside the Sit method. However, we don't want code in an ASP.NET page or in some other class to call this method - it'd just be silly. We can prevent this by controlling the scope of that method.
The two types of scope available in VB.NET and C# that you should know about are:
Public. Defining a property or method of a class as public allows that property or method to be called from outside the class itself. In other words, if an instance of this class is created inside another object (remember, too, that ASP.NET pages themselves are objects), public methods and properties are freely available to the code that created it. This is the default scope in VB.NET and C# classes.
Private. If a property or method of a class is private, it cannot be used from outside the class itself. If an instance of this class is created inside an object of a different class, the creating object has no access to private methods or properties of the created object.
Events
Events occur when a control object sends a message in response to some change that has happened to it. Generally, these changes occur as the result of user interaction with the control in the browser. For instance, when a button is clicked, a Click event is raised, and we can handle that event to perform some action. The object that triggers the event is referred to as the event sender; the object that receives the event is referred to as the event receiver.
Understanding Inheritance
Inheritance refers to the ability of one class to use properties and methods exposed by another class. In our dog example, we first created a class named Dog, then created instances of that class to represent individual dogs. However, dogs are types of animals, and many characteristics of dogs are shared by all (or most) animals. For instance, Rayne has four legs, two ears, one nose, two eyes, etc. It might be better, then, for us to create a base class named Animal. When we then define the Dog class, it would inherit from the Animal class, and all public properties and methods of Animal would be available to instances of the Dog class.
Similarly, we could create a new class based on the Dog class. In programming circles, this is called deriving a subclass from Dog. For instance, we might create a class for Australian Shepherd and one for my other dog Amigo, named Chihuahua, both of which would inherit the properties and methods of the Dog base class, and define new ones specific to each breed.
Don't worry too much if this is still a little unclear. The best way to appreciate inheritance is to see it used in a real program. The most obvious use of inheritance in ASP.NET comes with the technique of code-behind.
Wednesday, February 6, 2008
Using HttpHandlers and HttpModules in your ASP.NET Websites
Using HttpHandlers and HttpModules in your ASP.NET Websites
Introduction
In this article I would explain about HttpModules and HttpHandlers and how to use it on your Website.Sometimes, just creating dynamic Web pages with the latest languages and databases just does not give you , the developer enough control over an application. At times, you need to be able to dig deeper and create applications that can interact with the Web Server itself. You want to be able to interact with the low level processes such as how the Web Server processes incoming and outgoing HTTP requests.Before ASP.NET, in order to get this level of control using IIS, you were forced to create ISAPI extensions or filters. This proved to be quite daunting and painful task for many developers because creating ISAPI extensions and filters required knowledge of C/C++ and knowledge of how to create native Win32 DLLs. Thankfully, in .NET world, creating these types of low level applications is really no more difficult than most other tasks you would normally perform.
HttpModules
HttpModules are simple classes that can plug themselves into the request processing pipeline. They do this by hooking into a handful events thrown by the application as it processses the HTTP request. To create an HttpModule, you simply create a class that derives from the System.Web.IHttpModule interface. This interface requires you to implement two methods: Init and Dispose. The code snippet below will show you how to implement the methods.
Code in VB.NET
Imports Microsoft.VisualBasic
Imports System.Web
Public Class SimpleHttpModule Implements IHttpModule
Public Overridable Sub Init(ByVal context as HttpApplication) _
Implements IHttpModule.Init
End Sub
Public Overridable Sub Dispose() Implements IHttpModule.Dispose
End Sub
End Class
Code in C#
using System;
using System.Web;
public class SimpleHttpModule :IHttpModule {
public void Dispose() {
}
public void Init(HttpApplication context) {
}
}
The Init Method is the primary method that you use to implement the functionality. Notice that it has single method parameter named HttpApplication object named context. The parameter gives you access to the current HttpApplication context and it is what you use to wire up the different events that fired during the request processing.
Below is the list of the important EventName that you can use with the HttpApplication object.
1. AcquireRequestState.
Raised when ASP.NET runtime is ready to acquire the SessionState of the current Http request
2. AuthenticateRequest.
Raised when ASP.NET runtime is ready to authenticate the identity of the user.
3. AuthorizeRequest
Raised when ASP.NET runtime is ready to authorize the user for the resources user is trying to access.
4. BeginRequest
Raised when ASP.NET runtime receivess a new HTTP request.
5. End Request
Raised just before sending the response content to the client
Simple Example using HTTPModule
The example below will showsyou how to modified the HTTP output stream before it get sent to the client. This can be a simple and useful tool if you want to add text to each page served from your Website but do not want to modify each page.
Code in VB.NET
Public Class SimpleHTTPModule Implements IHttpModule
Dim WithEvents oApps as HttpApplication = Nothing
Public Overridable Sub Init(ByVal context as HttpApplication) _
Implements IHttpModule.Init
oApps = context
End Sub
Public Overridable Sub Dispose() Implements IHttpModule.Dispose
End Sub
Public Sub_context_PreSendRequestContent(ByVal sender As Object,_
ByVal e as EventArgs) Handles oApps.PreSendRequestContent
Dim message as String = ""
oApps.Context.Response.Output.Write(message);
End Sub
End Class
Code in C#
public class SimpleHTTPModule : IHttpModule
{
private HttpApplication oApps = null;
public void Dispose() {
}
public void Init(System.Web.HttpApplication context) {
oApps = context;
context.PreSendRequestContent += new EventHandler
(context_PreSendRequestContent);
}
void context_PreSendRequestContent(object sender,EventArgs e) {
string message = "<!-- This page is being processed at " +
System.DateTime.Now.ToString() + " -->"
oApps.Context.Response.Output.Write(message);
}
}
You can see from the code snippet above, we are using PreSendRequestContent event. This event fires right before the content is sent to the client and you have the last opportunity to modify it.In the PreSendRequestContent handler method, you simply create a string containing an HTML comment that contains the current time. You take this string and write it to the current HTTP requests output stream. The Http request is then sent back to the client.In order to use this module, you must let ASP.NET know that you want to include this module in the request pipeline. You can add the httpmodule section by modifying your web.config file.
The generic format of the httpModules in your web.config file is
If you have created your HttpModule in the App_code directory of an ASP.NET project, you might wonder how you know the assemblyname value should be,considering ASP.NET 2.0 now dynamically compiles your code at runtime. The solution is to use the text App_code as the assembly name. This tells ASP.NET that your module is located in the dynamically located assembly.You can also create HttpModules as a separate class library project in which case you simply use the assembly name of the library.After you have added this section on your web.config file, try to run any file of your web project and view source the generated aspx file. You should be able to see the commented date time as we previously coded in the http modules.
HttpHandlers
HttpHandlers differ from HttpModules not only because of their positions in the request processing pipeline, but also because they must be mapped to a specific file extensions. HttpHandlers are the last stop for the incoming Http requests and are ultimately the point in the request processing pipeline that is responsible for serving up the requested content, be it in ASPX page,HTML,plain text or an image. Additionally HttpHandlers can offer significant performance gains.In this arcticle, I will demonstrate two different ways to create a simple HttpHanlder that you can use to serve up dynamic images. First you look at creating an HttpHanlder using an ASHX file extension. Then you learn how you get even more control by mapping your HttpHandler to a custom file extension using IIS.Generic HandlersIn Visual Studio 2005, Microsoft has introduced new template specifically for HttpHandler and it ends with .ashx extension. The .ashx extension is the default HttpHander file extension set up by ASP.NET.Remember that HttpHandlers must be mapped to a unique file extensions. But luckily in asp.net 2.0, they have .ashx file extension that specifically created for HttpHandler purpose. This will save you heaps of time configuring and adding new file extension on your web.project
Outputting an image from HttpHandler
<@ WebHandler Language="VB" Class="Handler"/>
Imports System.Web
Public Class Handler:Implements IHttpHandler
Public Sub ProcessRequest(ByVal context as HttpContext) _
Implements IHttpHandler.ProcessRequest
context.Response.ContentType = "image/jpeg"
context.Response.WriteFile("Sunset.jpg")
End Sub
Public ReadOnly Property IsReusable() As Boolean _
Implements IHttpHandler.IsReusable
Get
Return False
End Get
End Property
End Class
<@ WebHandler Language="C#" Class="Handler"/>
using System.Web
public class Handler:IHttpHandler {
public void ProcessRequest(HttpContext context) {
context.Response.ContentType = "image/jpeg";
context.Response.WriteFile("Sunset.jpg");
}
public bool IsReusable {
get{
return false;
}
}
}
As you can see, simply change the ContentType method to image/jpeg to indicate that you are returning JPEG image, then you use the WriteFile() method to write an image file to the output stream. To use the handler, you can directly called the .ashx file from your html code The above example, shows very basic things you can do with HttpHandler.
Conclusion
The article above is basically an introduction to the HttpHandler and HttpModules. Lots of ASP.NET developers until now never use and never heard about HttpHandlers and HttpModules. The reason is because they keep applying the old way and old technology from Classic ASP 3.0. You can do the similar thing without the need of using HttpHandler and HttpModules. However using HttpHandler and HttpModules allow your website to be more manageable, extensible and less code written in your presentation layer. You encapsulate all the logic inside the HttpHandler and HttpModules. Thats all for now. Happy programming !
Introduction
In this article I would explain about HttpModules and HttpHandlers and how to use it on your Website.Sometimes, just creating dynamic Web pages with the latest languages and databases just does not give you , the developer enough control over an application. At times, you need to be able to dig deeper and create applications that can interact with the Web Server itself. You want to be able to interact with the low level processes such as how the Web Server processes incoming and outgoing HTTP requests.Before ASP.NET, in order to get this level of control using IIS, you were forced to create ISAPI extensions or filters. This proved to be quite daunting and painful task for many developers because creating ISAPI extensions and filters required knowledge of C/C++ and knowledge of how to create native Win32 DLLs. Thankfully, in .NET world, creating these types of low level applications is really no more difficult than most other tasks you would normally perform.
HttpModules
HttpModules are simple classes that can plug themselves into the request processing pipeline. They do this by hooking into a handful events thrown by the application as it processses the HTTP request. To create an HttpModule, you simply create a class that derives from the System.Web.IHttpModule interface. This interface requires you to implement two methods: Init and Dispose. The code snippet below will show you how to implement the methods.
Code in VB.NET
Imports Microsoft.VisualBasic
Imports System.Web
Public Class SimpleHttpModule Implements IHttpModule
Public Overridable Sub Init(ByVal context as HttpApplication) _
Implements IHttpModule.Init
End Sub
Public Overridable Sub Dispose() Implements IHttpModule.Dispose
End Sub
End Class
Code in C#
using System;
using System.Web;
public class SimpleHttpModule :IHttpModule {
public void Dispose() {
}
public void Init(HttpApplication context) {
}
}
The Init Method is the primary method that you use to implement the functionality. Notice that it has single method parameter named HttpApplication object named context. The parameter gives you access to the current HttpApplication context and it is what you use to wire up the different events that fired during the request processing.
Below is the list of the important EventName that you can use with the HttpApplication object.
1. AcquireRequestState.
Raised when ASP.NET runtime is ready to acquire the SessionState of the current Http request
2. AuthenticateRequest.
Raised when ASP.NET runtime is ready to authenticate the identity of the user.
3. AuthorizeRequest
Raised when ASP.NET runtime is ready to authorize the user for the resources user is trying to access.
4. BeginRequest
Raised when ASP.NET runtime receivess a new HTTP request.
5. End Request
Raised just before sending the response content to the client
Simple Example using HTTPModule
The example below will showsyou how to modified the HTTP output stream before it get sent to the client. This can be a simple and useful tool if you want to add text to each page served from your Website but do not want to modify each page.
Code in VB.NET
Public Class SimpleHTTPModule Implements IHttpModule
Dim WithEvents oApps as HttpApplication = Nothing
Public Overridable Sub Init(ByVal context as HttpApplication) _
Implements IHttpModule.Init
oApps = context
End Sub
Public Overridable Sub Dispose() Implements IHttpModule.Dispose
End Sub
Public Sub_context_PreSendRequestContent(ByVal sender As Object,_
ByVal e as EventArgs) Handles oApps.PreSendRequestContent
Dim message as String = ""
oApps.Context.Response.Output.Write(message);
End Sub
End Class
Code in C#
public class SimpleHTTPModule : IHttpModule
{
private HttpApplication oApps = null;
public void Dispose() {
}
public void Init(System.Web.HttpApplication context) {
oApps = context;
context.PreSendRequestContent += new EventHandler
(context_PreSendRequestContent);
}
void context_PreSendRequestContent(object sender,EventArgs e) {
string message = "<!-- This page is being processed at " +
System.DateTime.Now.ToString() + " -->"
oApps.Context.Response.Output.Write(message);
}
}
You can see from the code snippet above, we are using PreSendRequestContent event. This event fires right before the content is sent to the client and you have the last opportunity to modify it.In the PreSendRequestContent handler method, you simply create a string containing an HTML comment that contains the current time. You take this string and write it to the current HTTP requests output stream. The Http request is then sent back to the client.In order to use this module, you must let ASP.NET know that you want to include this module in the request pipeline. You can add the httpmodule section by modifying your web.config file.
The generic format of the httpModules in your web.config file is
If you have created your HttpModule in the App_code directory of an ASP.NET project, you might wonder how you know the assemblyname value should be,considering ASP.NET 2.0 now dynamically compiles your code at runtime. The solution is to use the text App_code as the assembly name. This tells ASP.NET that your module is located in the dynamically located assembly.You can also create HttpModules as a separate class library project in which case you simply use the assembly name of the library.After you have added this section on your web.config file, try to run any file of your web project and view source the generated aspx file. You should be able to see the commented date time as we previously coded in the http modules.
HttpHandlers
HttpHandlers differ from HttpModules not only because of their positions in the request processing pipeline, but also because they must be mapped to a specific file extensions. HttpHandlers are the last stop for the incoming Http requests and are ultimately the point in the request processing pipeline that is responsible for serving up the requested content, be it in ASPX page,HTML,plain text or an image. Additionally HttpHandlers can offer significant performance gains.In this arcticle, I will demonstrate two different ways to create a simple HttpHanlder that you can use to serve up dynamic images. First you look at creating an HttpHanlder using an ASHX file extension. Then you learn how you get even more control by mapping your HttpHandler to a custom file extension using IIS.Generic HandlersIn Visual Studio 2005, Microsoft has introduced new template specifically for HttpHandler and it ends with .ashx extension. The .ashx extension is the default HttpHander file extension set up by ASP.NET.Remember that HttpHandlers must be mapped to a unique file extensions. But luckily in asp.net 2.0, they have .ashx file extension that specifically created for HttpHandler purpose. This will save you heaps of time configuring and adding new file extension on your web.project
Outputting an image from HttpHandler
<@ WebHandler Language="VB" Class="Handler"/>
Imports System.Web
Public Class Handler:Implements IHttpHandler
Public Sub ProcessRequest(ByVal context as HttpContext) _
Implements IHttpHandler.ProcessRequest
context.Response.ContentType = "image/jpeg"
context.Response.WriteFile("Sunset.jpg")
End Sub
Public ReadOnly Property IsReusable() As Boolean _
Implements IHttpHandler.IsReusable
Get
Return False
End Get
End Property
End Class
<@ WebHandler Language="C#" Class="Handler"/>
using System.Web
public class Handler:IHttpHandler {
public void ProcessRequest(HttpContext context) {
context.Response.ContentType = "image/jpeg";
context.Response.WriteFile("Sunset.jpg");
}
public bool IsReusable {
get{
return false;
}
}
}
As you can see, simply change the ContentType method to image/jpeg to indicate that you are returning JPEG image, then you use the WriteFile() method to write an image file to the output stream. To use the handler, you can directly called the .ashx file from your html code
Conclusion
The article above is basically an introduction to the HttpHandler and HttpModules. Lots of ASP.NET developers until now never use and never heard about HttpHandlers and HttpModules. The reason is because they keep applying the old way and old technology from Classic ASP 3.0. You can do the similar thing without the need of using HttpHandler and HttpModules. However using HttpHandler and HttpModules allow your website to be more manageable, extensible and less code written in your presentation layer. You encapsulate all the logic inside the HttpHandler and HttpModules. Thats all for now. Happy programming !
Improve your ASP.NET Site performance with Caching
Improve your ASP.NET Site performance with Caching
In this article, I would like to share my experience and knowledge about ASP.NET Caching and how it can improve your website performance. As you all might know that performance is key requirement for any application or piece of code that you develop. For mission critical website, Caching is the way to go to significantly enhance your web response times. Caching is the process of storing frequently used data on the server to fulfill subsequent requests.You will discover that grabbing data or objects from memory is much faster than recreating the web pages or items contained in them from scratch.
When and Why use Caching
A Proper use and fine tune of caching approach of caching will result on better performance and scalability of your site. However improper use of caching will actually slow down and consume lots of your server performance and memory usage.
Good candidate to use caching is if you have infrequent chance of data or static content of web page.
For example, Stock market website displaying 20 minutes delay data can actually use data caching to store the data, so that it can reduce database call every time the user refresh the page.
Another good example would be using Partial page caching to store some of the infrequent or static content. If you have websites that show lots of information or features, you can actually group the static or infrequent change content into user controls and then set the Caching for that particular user controls. You can set the amount of time when the caching expires so that it will load new data from database.
Type of Caching
1. Output Caching (Page Caching)
The most easiest and simple caching that you can implement. Good for caching the static page that is accessed frequently. You can copy and paste the code below on your ASP.NET page.
Duration attribute specifies how long in seconds that the page will be held in the memory. When the cache expired, the asp.net engine will automatically reload and refreshes the page again. If the page never change, you can actually set the duration to very long period.
Valid Parameters for OutputCaching
1. VaryByParam
The VaryByParam attribute is for caching different type of page based on the HTTP Post or HTTP Get Protocol
e.g You can cache dynamic content based on different query string provided.
In this case, asp.net engine will cache the dynamic page based on the different query string provided. If your page is generating different content based on the query string, then you need to put that in the output cache directive or else all your users will see the same content.
If you want to cache a new version of the page based on any differences in the Query String parameters, use VaryByParam = "*" as in the following code.
2.VaryByControl
VaryByControl can be used to cache the usercontrol inside your page. For example you can cache a user control that contains ComboBox that render all the country name in the world. And perhaps those country data is retrieved from database, this will make significant performance for page loading time.
3.VaryByCustom
To make the Cache object even more flexible, Microsoft built in the ability to cache the page based on a string, which is then controlled from the actual code of the application
It does have one "out of the box" property, Browser. When VaryByCustom is set to Browser the page is cached every time a different browser agent and major version number requests the page.
If you like to have your own set of Caching rule ,then you might need to tweak some of the code in global .aspx
For e.g You might need to differentiate caching content for different set of users based on cookies called Language. Then you need to copy and paste the following code in your global.asax file.
Code in VB.NET
Overrides Function GetVaryByCustomString(ByVal context as HttpContext,_
ByVal arg as String) As String
If arg.ToLower() = "cookies" Then
Dim cookie as HttpCookie = context.Request.Cookies("Language")
If cookie isNot nothing Then
Return cookie.Value
End if
End If
Return MyBase.GetVaryByCustomString(context,arg)
End Function
Code in C#
public override string GetVaryByCustomString(HttpContext context, string arg)
{
if (arg.ToLower() == "cookies")
{
HttpCookie cookie = context.Request.Cookies["Language"];
if (cookie != null)
{
return cookie.Value;
}
}
return base.GetVaryByCustomString(context, arg);
}
After that , set the VaryByCustom attribute to "cookies" in your OutputCache directives.
By doing that you will generate different set of caching based on the Client languages cookies. This is just one of the example of doing VaryByCustom caching, you can actually create your own set of caching rules by differentiating caching based on user logged on, and etc.
4.VaryByHeader
Varies cache entries based on variations in a specified header
2. Partial Page (UserControl) Caching.
Similar to output Caching, partial page caching allows you to cache certain blocks of your website.You can for example only cache the center of the page. Partial page is achieved with the caching of the user controls. You can build your ASP.NET pages consisting of numerous user controls and then apply output caching on the user controls you select. This will caches only parts of the page that you want and leaving other parts of page outside the reach of caching.
This is very nice feature and if it done correctly, it can lead to pages that perform better.
Note :
Typically UserControls are placed on multiple pages to maximize reuse. However, when these UserControls (ASCX Files) are cached with the @OutputCache Directive , they are cached on per page basis.That means even if a User Control outputs the identical HTML when placed on pageA.aspx as it does placed on pageB.aspx,its output is cached twice.
You can prevent this to happen by adding Shared = true in the output cache directive.
By putting Shared attributed, the memory savings can be surprisingly large.
If you have an ASCX User control using the OutputCache directive,remember that User Control exists only for the first request.
3. Data Caching
Output Caching and Partial Page caching is useful if you want to cache the output of the page. However if you like to cache DataSet object or any Collections object, you can use Data Caching to implement that.
ASP.NET has one class called Cache Object to start caching specific data items for later use on particular page or group of pages. The cache object enables you to store everything from simple name/value pairs to more complex objects like datasets and entire .aspx pages.
VB.NET
Cache("MyDataSet") = myDataSet;
C#
Cache("MyDataSet") = myDataSet;To retrieve the data from the cache, you can use the code below.
VB.NET
Dim ds as New DataSet
ds = CType(Cache("MyDataSet"),DataSet)
C#
DataSet ds = new DataSet();
ds = (DataSet) Cache["MyDataSet"];
Conclusion
As we've just seen, caching Web pages with ASP.NET is amazingly easy, accomplished with a simple line. With this glimpse of ASP.NET's caching abilities, you can improve your Web application's performance. But remember Caching in ASP.net is a trade off between CPU and memory. How hard is it to make this page versus whether you can afford to hold 200 versions of it. If it's only 5KB of HTML, a potential megabyte of memory could pay off handsomely versus thousands and thousands of database access. Every page of request served from the cache saves you a trip to the database.
Tuesday, February 5, 2008
Master Pages in ASP.Net 2.0
Introduction
One of the new features of ASP.Net 2.0 is Master Pages. Master Pages enables us to apply the same page layout to multiple pages in a Web Application. A page that uses a master page is known as the content page.
Using Master Pages we can create a consistent look and feel for our websites. Pages in a web application have the standard elements such as logos, menus, copyright notices, etc. that are repeated on each and every page. And usually a web-site has a single layout design that each page corresponds to. Using master pages, we can place all these elements and define the layout and design in a master page. And when we base a content page on this master page, then all of the content pages will automatically include all of the standard elements and will define whatever layout you defined in the master page.
In this article, I'll spin through a small sample application to help you in understanding the advantages of master pages and how can work with them. I'll also explore some of the advanced features of Master Pages, such as modifying header element from the content page, so that if each content page needs to display a different Title Header, you can easily have it done. I will also take a look at loading the master page at run-time, and use of Nested Master pages.
Prerequisites
This tutorial assumes that you own a copy of Visual Studio 2005 or Visual Web Developer Express. It also assumes that you are familiar with ASP.Net 2.0 basics.
Creating the Website
If you have an existing web site, you can skip this section. Otherwise, you can create a new web site and page by following these steps.
To create a file system Web site:
- Open Visual Studio 2005.
- On the File menu, open New and click on Web Site.
The New Web Site dialog box appears.
- Under Visual Studio installed templates, click ASP.NET Web Site.
- In the Location box, enter the name of the folder where you want to keep the pages of your Web site.
For example, type the folder name C:\WebSites\mySite.
- In the Language list, click Visual Basic (or the language you prefer to work with).
- Click OK.
Visual Web Developer creates the folder and a new page named Default.aspx.
Creating a Simple Master Page
Right-click in the solution explorer and select Add New Item. Select Master Page from the template and provide a name for the page. In this example I am using myMaster.master (where .master is the extension of the file). Click Add.
This will add the .master file to the project. Which is our master page.
A Master Page can contain the same Web controls, User controls, HTML content, and scripts that can be added to a standard ASP.NET page. There are three important differences between a Master Page and a normal ASP.NET page.
First, unlike a normal ASP.NET page, the name of a Master Page must end with the special extension .master. This extension marks the page as a Master Page. Furthermore, an ASP.NET application is configured so that you cannot request pages with the .master extension.
Second, a Master Page includes a <%@ Master %> directive instead of the normal <%@ Page %> directive. The <%@ Master %> directive supports many of the same attributes as the <%@ Page %> directive. For example, you can specify the programming language of the page with the directive <%@ Master Language="vb" %>.
The final difference between a Master Page and a normal ASP.NET page is that a Master Page can contain zero or more ContentPlaceHolder controls. A ContentPlaceHolder control can be used only within a Master Page. This control marks an area of a Master Page that can be overridden by a particular content page.
The HTML code for this is:
<>
In the above HTML code, the ContentPlaceHolder control is what identifies the area where the content place data will come. With Master/Content pages, you can have multiple ContentPlaceHolder controls in the Master Page.
Creating a Content Page
Right-click the project in the solution explorer and select Add New Item. Select Web Page from the template and check Select Master Page. Click on Add. This will open the Select Master Page dialog box, listing all the master pages defined in the project. Select the master page myMaster.master and click OK.
The HTML code for the new content page is:
<%@ Page Language="VB" MasterPageFile="~/myMaster.master" AutoEventWireup="false" CodeFile="Default.aspx.vb" Inherits="_Default" title="Untitled Page" %>
We've looked at how one can create a single Master Page and base a content page on the Master Page.
Furthermore, if you have the need, you can even nest multiple Master Pages. For example, you can create one Master Page for the entire Web site and then nest Master Pages below the site Master Page for individual sections.
Visual Studio/Visual Web Developer does not provide designer support for doing this. So, if you want to nest Master Pages, you'll need to stick to either source code view or build your pages using Notepad.
For example, following could be used for a Site Master Page. This Master Page contains the opening and closing HTML and Form tags and a single ContentPlaceHolder control.
<%@ Master %>
<.html>
<.head>
<.title>Site Master
<./head>
<.body bgcolor="LightGreen">
And the following could be the nested master page. This Master Page overrides the content in the Site Master Page. Notice that the <%@ Master %> directive refers to the SiteMaster.master Master Page.
<%@ Master MasterPageFile="~/SiteMaster.master" %>
runat="server">
Finally, the content is based on the Section Master Page. Notice that this page overrides the two ContentPlaceHolder controls contained in the Section Master Page.
<%@ Page MasterPageFile="~/SectionMaster.master" %>
Runat="Server">
This content appears in the left column
Runat="Server">
This content appears in the right column
Configuring Master Pages
There is an alternative to associating a content page with a Master Page by using the <%@ Page %> directive. One can associate a Master Page with a content page within the Web application's configuration file. Using the configuration file makes it easier to maintain large Web sites, since they can change the Master Page associated with many content pages in a single location.
You set the Master Page within the element of a configuration file. (This element appears in the section of a configuration file.) For example, the following element sets the default Master Page to "myMaster.master":
Two major points to be aware of... The first is that if you want to use the Web.Config file to set the Master Pages, then you should not include the MasterPageFile attribute in the content pages. This is because setting a Master Page within a content page takes precedence over any Master Page set in the configuration file.
Second, the application can contain more than one Web.Config file located in different subfolders that set different Master Pages. In other words, one can override the Master Page set in a Web.Config file within a subfolder by creating a new Web.Config file. This is a really useful and important technique.
Overriding Master Page Properties
One issue that can be encountered almost immediately when working with Master Pages is the issue of how to override such properties as the page title and meta tags of a Master Page in individual content pages. It is common to want to display unique titles for each content page, even when the individual content pages are based on a shared Master Page.
There are multiple ways of overriding the content contained in a Master Page within a particular content page. I'll explore the most common two methods...
If you simply want to change the page title rendered by a Master Page from within a content page, then you can take advantage of the <%@ Page %> directive's Title attribute. This attribute only takes effect when the Master Page uses a server-side HtmlHead control.
For example, the Master Page Code below contains a server-side HtmlHead control.
<%@ Master %>
<.html>
<.head id="Head1" runat="server">
<.title>Master Title
<.body>
Notice that the <.head> tag includes a runat="server" attribute. This attribute transforms the <.head> tag into a server-side HtmlHead control.
The content page below overrides the page title. Notice that the <%@ Page %> directive at the top of this page has a value for its Title attribute. When the page is rendered, the text "Content Page Title" is displayed as the page title.
<%@ Page MasterPageFile="~/TitleMaster.master" Title="Content Page Title" %>
Runat="Server">
Here is some content
If you need to override other attributes of an HTML header, such as the meta tags or style tags, then you can reference the HtmlHead element directly from a content page. The HtmlHead control implements the IPageHeader interface, which includes the following properties:
LinkedStyleSheets - The external style sheets linked to the HTML page.
Metadata - The collection of Metadata tags.
StyleSheet- Represents the styles applied to the HTML page.
Title- The title of the HTML page.
Any of these properties can be easily modified within a content page.
Dynamically loading Master Pages
In the end, I'll take a look at an advanced application of Master Pages, that is to dynamically load different Master Pages at run-time.
There are a couple of circumstances in which dynamically loading Master Pages is useful. First, you might need to co-brand your Web site with one or more partner Web sites. When someone links to your Web site from a partner Web site, you might want to automatically load up a Master Page that matches the look and feel of the partner Web site.
Another situation in which you might want to dynamically load Master Pages is when you want the users of your application to be able to pick a page layout. You can provide your users with a set of standard Master Pages. Users of your application can then select their favorite page layout by selecting their favorite Master Page.
You can dynamically load a Master Page by assigning a value to the MasterPageFile property of the Page object. The value assigned to this property should be a relative path to a valid Master Page file.
There is one important restriction that you must be aware of when using the MasterPageFile property. You can only assign a value to this property before or during the Page PreInit event. The PreInit is the earliest event during the page execution lifecycle. If you attempt to assign a value to this property during a later event, such as the Page Load event, then you'll receive an exception. This restriction makes sense, since different Master Pages will result in different sets of controls being loaded into the page.
To define a Master Page at run-time, simply add the handler for the PreInit even and supply the master page...
And all things must come to an end...
The main emphasis in this article was on ASP.Net 2.0 Master Pages. There is no question that Master Pages are my favorite new feature of ASP.Net 2.0. I hope you found this article interesting and informative. I am open for suggestions and remarks, both negative and positive.
One of the new features of ASP.Net 2.0 is Master Pages. Master Pages enables us to apply the same page layout to multiple pages in a Web Application. A page that uses a master page is known as the content page.
Using Master Pages we can create a consistent look and feel for our websites. Pages in a web application have the standard elements such as logos, menus, copyright notices, etc. that are repeated on each and every page. And usually a web-site has a single layout design that each page corresponds to. Using master pages, we can place all these elements and define the layout and design in a master page. And when we base a content page on this master page, then all of the content pages will automatically include all of the standard elements and will define whatever layout you defined in the master page.
In this article, I'll spin through a small sample application to help you in understanding the advantages of master pages and how can work with them. I'll also explore some of the advanced features of Master Pages, such as modifying header element from the content page, so that if each content page needs to display a different Title Header, you can easily have it done. I will also take a look at loading the master page at run-time, and use of Nested Master pages.
Prerequisites
This tutorial assumes that you own a copy of Visual Studio 2005 or Visual Web Developer Express. It also assumes that you are familiar with ASP.Net 2.0 basics.
Creating the Website
If you have an existing web site, you can skip this section. Otherwise, you can create a new web site and page by following these steps.
To create a file system Web site:
- Open Visual Studio 2005.
- On the File menu, open New and click on Web Site.
The New Web Site dialog box appears.
- Under Visual Studio installed templates, click ASP.NET Web Site.
- In the Location box, enter the name of the folder where you want to keep the pages of your Web site.
For example, type the folder name C:\WebSites\mySite.
- In the Language list, click Visual Basic (or the language you prefer to work with).
- Click OK.
Visual Web Developer creates the folder and a new page named Default.aspx.
Creating a Simple Master Page
Right-click in the solution explorer and select Add New Item. Select Master Page from the template and provide a name for the page. In this example I am using myMaster.master (where .master is the extension of the file). Click Add.
This will add the .master file to the project. Which is our master page.
A Master Page can contain the same Web controls, User controls, HTML content, and scripts that can be added to a standard ASP.NET page. There are three important differences between a Master Page and a normal ASP.NET page.
First, unlike a normal ASP.NET page, the name of a Master Page must end with the special extension .master. This extension marks the page as a Master Page. Furthermore, an ASP.NET application is configured so that you cannot request pages with the .master extension.
Second, a Master Page includes a <%@ Master %> directive instead of the normal <%@ Page %> directive. The <%@ Master %> directive supports many of the same attributes as the <%@ Page %> directive. For example, you can specify the programming language of the page with the directive <%@ Master Language="vb" %>.
The final difference between a Master Page and a normal ASP.NET page is that a Master Page can contain zero or more ContentPlaceHolder controls. A ContentPlaceHolder control can be used only within a Master Page. This control marks an area of a Master Page that can be overridden by a particular content page.
The HTML code for this is:
<
In the above HTML code, the ContentPlaceHolder control is what identifies the area where the content place data will come. With Master/Content pages, you can have multiple ContentPlaceHolder controls in the Master Page.
Creating a Content Page
Right-click the project in the solution explorer and select Add New Item. Select Web Page from the template and check Select Master Page. Click on Add. This will open the Select Master Page dialog box, listing all the master pages defined in the project. Select the master page myMaster.master and click OK.
The HTML code for the new content page is:
<%@ Page Language="VB" MasterPageFile="~/myMaster.master" AutoEventWireup="false" CodeFile="Default.aspx.vb" Inherits="_Default" title="Untitled Page" %>
We've looked at how one can create a single Master Page and base a content page on the Master Page.
Furthermore, if you have the need, you can even nest multiple Master Pages. For example, you can create one Master Page for the entire Web site and then nest Master Pages below the site Master Page for individual sections.
Visual Studio/Visual Web Developer does not provide designer support for doing this. So, if you want to nest Master Pages, you'll need to stick to either source code view or build your pages using Notepad.
For example, following could be used for a Site Master Page. This Master Page contains the opening and closing HTML and Form tags and a single ContentPlaceHolder control.
<%@ Master %>
<.html>
<.head>
<.title>Site Master
<./head>
<.body bgcolor="LightGreen">
And the following could be the nested master page. This Master Page overrides the content in the Site Master Page. Notice that the <%@ Master %> directive refers to the SiteMaster.master Master Page.
<%@ Master MasterPageFile="~/SiteMaster.master" %>
runat="server">
Section Master Page | |
Runat="Server" /> | Runat="Server" /> |
Finally, the content is based on the Section Master Page. Notice that this page overrides the two ContentPlaceHolder controls contained in the Section Master Page.
<%@ Page MasterPageFile="~/SectionMaster.master" %>
Runat="Server">
This content appears in the left column
Runat="Server">
This content appears in the right column
Configuring Master Pages
There is an alternative to associating a content page with a Master Page by using the <%@ Page %> directive. One can associate a Master Page with a content page within the Web application's configuration file. Using the configuration file makes it easier to maintain large Web sites, since they can change the Master Page associated with many content pages in a single location.
You set the Master Page within the
Two major points to be aware of... The first is that if you want to use the Web.Config file to set the Master Pages, then you should not include the MasterPageFile attribute in the content pages. This is because setting a Master Page within a content page takes precedence over any Master Page set in the configuration file.
Second, the application can contain more than one Web.Config file located in different subfolders that set different Master Pages. In other words, one can override the Master Page set in a Web.Config file within a subfolder by creating a new Web.Config file. This is a really useful and important technique.
Overriding Master Page Properties
One issue that can be encountered almost immediately when working with Master Pages is the issue of how to override such properties as the page title and meta tags of a Master Page in individual content pages. It is common to want to display unique titles for each content page, even when the individual content pages are based on a shared Master Page.
There are multiple ways of overriding the content contained in a Master Page within a particular content page. I'll explore the most common two methods...
If you simply want to change the page title rendered by a Master Page from within a content page, then you can take advantage of the <%@ Page %> directive's Title attribute. This attribute only takes effect when the Master Page uses a server-side HtmlHead control.
For example, the Master Page Code below contains a server-side HtmlHead control.
<%@ Master %>
<.html>
<.head id="Head1" runat="server">
<.title>Master Title
<.body>
Notice that the <.head> tag includes a runat="server" attribute. This attribute transforms the <.head> tag into a server-side HtmlHead control.
The content page below overrides the page title. Notice that the <%@ Page %> directive at the top of this page has a value for its Title attribute. When the page is rendered, the text "Content Page Title" is displayed as the page title.
<%@ Page MasterPageFile="~/TitleMaster.master" Title="Content Page Title" %>
Runat="Server">
Here is some content
If you need to override other attributes of an HTML header, such as the meta tags or style tags, then you can reference the HtmlHead element directly from a content page. The HtmlHead control implements the IPageHeader interface, which includes the following properties:
LinkedStyleSheets - The external style sheets linked to the HTML page.
Metadata - The collection of Metadata tags.
StyleSheet- Represents the styles applied to the HTML page.
Title- The title of the HTML page.
Any of these properties can be easily modified within a content page.
Dynamically loading Master Pages
In the end, I'll take a look at an advanced application of Master Pages, that is to dynamically load different Master Pages at run-time.
There are a couple of circumstances in which dynamically loading Master Pages is useful. First, you might need to co-brand your Web site with one or more partner Web sites. When someone links to your Web site from a partner Web site, you might want to automatically load up a Master Page that matches the look and feel of the partner Web site.
Another situation in which you might want to dynamically load Master Pages is when you want the users of your application to be able to pick a page layout. You can provide your users with a set of standard Master Pages. Users of your application can then select their favorite page layout by selecting their favorite Master Page.
You can dynamically load a Master Page by assigning a value to the MasterPageFile property of the Page object. The value assigned to this property should be a relative path to a valid Master Page file.
There is one important restriction that you must be aware of when using the MasterPageFile property. You can only assign a value to this property before or during the Page PreInit event. The PreInit is the earliest event during the page execution lifecycle. If you attempt to assign a value to this property during a later event, such as the Page Load event, then you'll receive an exception. This restriction makes sense, since different Master Pages will result in different sets of controls being loaded into the page.
To define a Master Page at run-time, simply add the handler for the PreInit even and supply the master page...
And all things must come to an end...
The main emphasis in this article was on ASP.Net 2.0 Master Pages. There is no question that Master Pages are my favorite new feature of ASP.Net 2.0. I hope you found this article interesting and informative. I am open for suggestions and remarks, both negative and positive.
Encryption and Decryption of a COOKIE
Tracking Visitors with ASP.NET, showed how to use cookies to keep track of site visitors across sessions. I also discussed privacy issues concerning the use of cookie data, particularly if you are storing sensitive information about your visitors/users. It is always a good idea to publish privacy statements to inform your users about how their data is being used and stored on your Web site.
Cookies can provide a real convenience to both visitors and programmers of a Web-based application. However, cookies are problematic from a security point of view for two reasons. First, unless your site uses SSL, cookie data is passed in the clear in the header of both the HTTP request and response. That means anyone who is clever enough to sniff packets on a particular port of a particular IP address can read cookie data as plain as day. The second problem is that cookie data is stored in nice little unrestricted cookie files in a browser's cache directory. This means that anyone that has access to your hard drive can see and open your cookies. Figure #1 shows an example of the contents of a cookie file.
So when your 16 year old finds this "convenient" data and forges off to rack up thousands of dollars in charges on www.HottiesBareAll.com, it will suddenly become clear why cookie security is important.
If you have never seen the voluminous quantity of cookie data on your machine, try the following. Open Internet Explorer, select Tools and then Internet Options from the menu. From the Internet Options dialog click the Settings button. Then on the Settings dialog click View Files. An Explorer window will display all the cached data your browser has kindly filled your hard drive with. Sort the list alphabetically, then scroll down to the Cs. (C is for "Cookie" :)) On my machine, there are currently 1,850 cookie files.
So, here is some advice - don't store sensitive data about users in cookies. If you must, then you have a responsibility to protect that data through encryption.
In previous versions of ASP, you would have been forced to purchase third party components to handle this encryption, or, if you are a genius, you could have ventured off and created your own components. However, most of us resorted to simple techniques that shift the ASCII values of each character in a string, like Rot13. Unfortunately, these techniques are more than obvious to people that are clever enough to sniff packets in the first place.
Fortunately, we no longer have to implement our own feeble security algorithms since the .NET Framework provides us with a slew of encryption classes in the System.Security.Cryptography namespace. Take a look for yourself.
http://msdn.microsoft.com/library/en-us/cpref/html/frlrfsystemsecuritycryptography.asp?frame=true
Overview of Cryptography in .NET
First, let's just acknowledge that encryption is really complicated. Frankly, it's supposed to be complicated because that is what makes it secure. And, by the way, I want to state here that I am in no way an encryption expert. There are probably only a handful of people that fully understand the intricacies of the math involved, and half of them probably wrote the cryptography classes for the .NET Framework.
Fortunately, we don't have to understand the intricacies to take advantage of encryption because the .NET Framework gives us a simple way to access the power of the best and most secure algorithms.
Before we begin encrypting our cookie data, we should have a little discussion about the cryptography classes and which ones are appropriate for securing our cookies.
What Is Encryption Exactly?
In the simplest terms, encryption is the process of taking a target string of characters (bytes, more specifically) and converting it into another string of characters so that by examination, the original characters cannot be deciphered. This process is performed with a second string of characters known as a "key". In technical terms, this key is mathematically "mashed" into the original string over many complex and compounded iterations. In addition, sometimes another string of characters, known as an "initialization vector", is "mangled" into the target string before the key is mashed. This helps to prevent obvious patterns in the target string from being revealed by mashing alone. Of course, the mashing and mangling is not permanent. If the key and the initialization vector remain intact, then the algorithms can use them in reverse to unmangle and unmash the original data.
The effectiveness or "strength" of the encryption is determined by the size of the key used. The larger the key, the stronger the encryption. Typical key sizes are 64 bit (8 bytes), 128 bit (16 bytes), 192 bit (24 bytes), 256 bit (32 bytes) and 512 bit (64 bytes). The only way to crack most of these algorithms is by sheer brute force, where an attacker creates a program to test every single possible key combination. For even the 64-bit option, there are 72,057,594,037,927,936 possible combinations (2^56 - 8 bits are held for parity). So basically, unless you have a very powerful computer, you are going to be waiting awhile to crack even the weakest key.
Cryptography Patterns
There are two basic approaches for handling data encryption: symmetric (or private key) and asymmetric (or public key). In symmetric cryptography techniques, both sides of the data exchange (the encryptor and decryptor) must have access to a single secret private key.
In asymmetric encryption, one side (the decryptor) requests a public key from the encryptor. The encryptor creates a public key and sends it to the requestor. Then the encryptor uses the public key to create a second unique private key that it holds on to. This new private key is used to encrypt the message sent to the decryptor, who then uses the public key to decrypt the message. If encrypted data must be sent in the other direction then the other side will create a new public key and sends it along in a reciprocal fashion. This asymmetric technique is used by SSL to secure HTTP transmissions.
For our cookie encryption purposes, we will use the symmetric approach since both the encryption and decryption will take place in the same application on the server; therefore, we only need one private key that we will keep secure in the compiled code of our cryptographic utility class.
Cryptographic Service Providers
The .NET Framework provides 4 cryptographic algorithms that extend from the base SymmetricAlgorithm class:
* System.Security.Cryptography.DES (Data Encryption Standard)
* System.Security.Cryptography.TripleDES (Triple Data Encryption Standard)
* System.Security.Cryptography.RC2
* System.Security.Cryptography.Rijndael
In our example project, we will demonstrate both the DES and TripleDES algorithms. Each of these algorithms is accessed through wrapper classes categorized as Cryptographic Service Providers (CSP).
All CSP objects have two important methods: CreateEncryptor & CreateDecryptor. Each method has two parameters for our private key and initialization vector. Each method returns an algorithm object with the ICryptoTransform interface. This object will be used by the CryptoStream object(which we will discuss in a minute.)
For more a in-depth discussion of Cryptography in .NET, visit the following link in the MSDN Library:
http://msdn.microsoft.com/library/en-us/cpguide/html/cpconcryptographyoverview.asp?frame=true
Key Size Considerations
DES is one of the weaker encryption methods because its key size is limited to 64 bits. However, for our cookie purposes, this level of encryption is probably sufficient. TripleDES, which, believe it or not, performs the encryption three times, also has a larger key size. The length of the key must be either 128 or 192 bits - two to three times larger. TripleDES is significantly more secure.
Deciding which algorithm to use should not only be based on your desire for stronger encryption but also by the size of the cookies you require. You will notice in our example application that encrypted data will grow in size. And of course, the larger the key, the larger the resulting data. This is an important consideration since cookie data is restricted to 4kb.
An alternative is to store data that you only need to persist temporarily in hidden input tags. Of course, this is exactly what ViewState does in ASP.NET. In addition, ViewState offers some built-in encryption. The ViewState of a Web form, by default, uses hash functions from some of the asymmetric algorithms to garble the content. This is not fully secure. However, you can configure your ASP.NET application or individual pages to use more secure encryption on the ViewState - specifying the same TripleDES algorithm we discussed earlier. Here is an article on MSDN on how to do just that:
http://msdn.microsoft.com/library/en-us/dnaspnet/html/asp11222001.asp?frame=true
Of course, if you are carrying that much data around in cookies, you really should reconsider you Web-application design. Remember, each request made of the server will need to pass this cookie blob back, unnecessarily chewing up bandwidth.
Finally, encryption is a processor intensive activity. The more data you are encrypting/decrypting or the stronger your algorithm, the more server resources you will require, potentially slowing down the entire site.
The CryptoStream Object
One of the things you may find hard to understand at first is that all encryption and decryption in .NET is handled through the CryptoStream object. I know you are thinking that all we need to do is convert a few strings. Why do we need to mess with complicated streams. Well, from the broader scope of cryptographic issues and from the design emphasis of the .NET Framework, using streams really makes sense. Nearly all access (IO) to external resources handled by the .NET Framework is done through the use of streams. While it is not in the System.IO namespace, the CryptoStream object inherits from the System.IO.Stream object.
The major advantage of using streams is that they can be chained together. This is particularly useful when performing file operations or accessing other network services. For instance, you can open a socket to a network service and stream data that is simultaneously being encrypted. The following link provides an example of DES provider encrypting a file through streams.
http://msdn.microsoft.com/library/en-us/cpref/html/frlrfSystemSecurityCryptographyDESClassTopic.asp?frame=true
So, in order to work with strings as a stream, we need to utilize a special class called a MemoryStream. This will allow us to handle strings as streams and flow them through the CryptoStream for processing.
Creating a Simple Cryptography Utility Class
Well, you have all been waiting patiently, so here is the code for our CryptoUtil class. As with many utility functions, these don't require state so all our methods are shared (static).
Imports System.Diagnostics
Imports System.Security.Cryptography
Imports System.Text
Imports System.IO
Public Class CryptoUtil
'8 bytes randomly selected for both the Key and the Initialization Vector
'the IV is used to encrypt the first block of text so that any repetitive
'patterns are not apparent
Private Shared KEY_64() As Byte = {42, 16, 93, 156, 78, 4, 218, 32}
Private Shared IV_64() As Byte = {55, 103, 246, 79, 36, 99, 167, 3}
'24 byte or 192 bit key and IV for TripleDES
Private Shared KEY_192() As Byte = {42, 16, 93, 156, 78, 4, 218, 32, _
15, 167, 44, 80, 26, 250, 155, 112, _
2, 94, 11, 204, 119, 35, 184, 197}
Private Shared IV_192() As Byte = {55, 103, 246, 79, 36, 99, 167, 3, _
42, 5, 62, 83, 184, 7, 209, 13, _
145, 23, 200, 58, 173, 10, 121, 222}
'Standard DES encryption
Public Shared Function Encrypt(ByVal value As String) As String
If value <> "" Then
Dim cryptoProvider As DESCryptoServiceProvider = _
New DESCryptoServiceProvider()
Dim ms As MemoryStream = New MemoryStream()
Dim cs As CryptoStream = _
New CryptoStream(ms, cryptoProvider.CreateEncryptor(KEY_64, IV_64), _
CryptoStreamMode.Write)
Dim sw As StreamWriter = New StreamWriter(cs)
sw.Write(value)
sw.Flush()
cs.FlushFinalBlock()
ms.Flush()
'convert back to a string
Return Convert.ToBase64String(ms.GetBuffer(), 0, ms.Length)
End If
End Function
'Standard DES decryption
Public Shared Function Decrypt(ByVal value As String) As String
If value <> "" Then
Dim cryptoProvider As DESCryptoServiceProvider = _
New DESCryptoServiceProvider()
'convert from string to byte array
Dim buffer As Byte() = Convert.FromBase64String(value)
Dim ms As MemoryStream = New MemoryStream(buffer)
Dim cs As CryptoStream = _
New CryptoStream(ms, cryptoProvider.CreateDecryptor(KEY_64, IV_64), _
CryptoStreamMode.Read)
Dim sr As StreamReader = New StreamReader(cs)
Return sr.ReadToEnd()
End If
End Function
'TRIPLE DES encryption
Public Shared Function EncryptTripleDES(ByVal value As String) As String
If value <> "" Then
Dim cryptoProvider As TripleDESCryptoServiceProvider = _
New TripleDESCryptoServiceProvider()
Dim ms As MemoryStream = New MemoryStream()
Dim cs As CryptoStream = _
New CryptoStream(ms, cryptoProvider.CreateEncryptor(KEY_192, IV_192), _
CryptoStreamMode.Write)
Dim sw As StreamWriter = New StreamWriter(cs)
sw.Write(value)
sw.Flush()
cs.FlushFinalBlock()
ms.Flush()
'convert back to a string
Return Convert.ToBase64String(ms.GetBuffer(), 0, ms.Length)
End If
End Function
'TRIPLE DES decryption
Public Shared Function DecryptTripleDES(ByVal value As String) As String
If value <> "" Then
Dim cryptoProvider As TripleDESCryptoServiceProvider = _
New TripleDESCryptoServiceProvider()
'convert from string to byte array
Dim buffer As Byte() = Convert.FromBase64String(value)
Dim ms As MemoryStream = New MemoryStream(buffer)
Dim cs As CryptoStream = _
New CryptoStream(ms, cryptoProvider.CreateDecryptor(KEY_192, IV_192), _
CryptoStreamMode.Read)
Dim sr As StreamReader = New StreamReader(cs)
Return sr.ReadToEnd()
End If
End Function
End Class
Note that our keys are initialized at the top as an array of bytes. Also, note that I am using numeric constants in these arrays. If you choose to do the same, be sure to keep the values greater than or equal to zero and less than or equal to 255. This is the allowable range for a byte value.
In the class, we have 2 pairs of functions for encrypting and decrypting under both the DES and TripleDES providers. On the encrypt functions, the final byte array in the Memory Stream buffer is converted back to a string using the ToBase64String function. The reverse is done on the decrypt functions with the FromBase64String function.
Creating a Cookie Utility Class
Our next step is to create a simple class for setting and retrieving either plain cookies or those with encryption on top. Again we use series of shared methods to simplify the setting and getting of cookie data, allowing you to handle cookie data with one line of code.
Imports System.Web
Public Class CookieUtil
'SET COOKIE FUNCTIONS *****************************************************
'SetTripleDESEncryptedCookie - key & value only
Public Shared Sub SetTripleDESEncryptedCookie(ByVal key As String, _
ByVal value As String)
'Convert parts
key = CryptoUtil.EncryptTripleDES(key)
value = CryptoUtil.EncryptTripleDES(value)
SetCookie(key, value)
End Sub
'SetTripleDESEncryptedCookie - overloaded method with expires parameter
Public Shared Sub SetTripleDESEncryptedCookie(ByVal key As String, _
ByVal value As String, ByVal expires As Date)
'Convert parts
key = CryptoUtil.EncryptTripleDES(key)
value = CryptoUtil.EncryptTripleDES(value)
SetCookie(key, value, expires)
End Sub
'SetEncryptedCookie - key & value only
Public Shared Sub SetEncryptedCookie(ByVal key As String, _
ByVal value As String)
'Convert parts
key = CryptoUtil.Encrypt(key)
value = CryptoUtil.Encrypt(value)
SetCookie(key, value)
End Sub
'SetEncryptedCookie - overloaded method with expires parameter
Public Shared Sub SetEncryptedCookie(ByVal key As String, _
ByVal value As String, ByVal expires As Date)
'Convert parts
key = CryptoUtil.Encrypt(key)
value = CryptoUtil.Encrypt(value)
SetCookie(key, value, expires)
End Sub
'SetCookie - key & value only
Public Shared Sub SetCookie(ByVal key As String, ByVal value As String)
'Encode Part
key = HttpContext.Current.Server.UrlEncode(key)
value = HttpContext.Current.Server.UrlEncode(value)
Dim cookie As HttpCookie
cookie = New HttpCookie(key, value)
SetCookie(cookie)
End Sub
'SetCookie - overloaded with expires parameter
Public Shared Sub SetCookie(ByVal key As String, _
ByVal value As String, ByVal expires As Date)
'Encode Parts
key = HttpContext.Current.Server.UrlEncode(key)
value = HttpContext.Current.Server.UrlEncode(value)
Dim cookie As HttpCookie
cookie = New HttpCookie(key, value)
cookie.Expires = expires
SetCookie(cookie)
End Sub
'SetCookie - HttpCookie only
'final step to set the cookie to the response clause
Public Shared Sub SetCookie(ByVal cookie As HttpCookie)
HttpContext.Current.Response.Cookies.Set(cookie)
End Sub
'GET COOKIE FUNCTIONS *****************************************************
Public Shared Function GetTripleDESEncryptedCookieValue(ByVal key As String) _ As String
'encrypt key only - encoding done in GetCookieValue
key = CryptoUtil.EncryptTripleDES(key)
'get value
Dim value As String
value = GetCookieValue(key)
'decrypt value
value = CryptoUtil.DecryptTripleDES(value)
Return value
End Function
Public Shared Function GetEncryptedCookieValue(ByVal key As String) As String
'encrypt key only - encoding done in GetCookieValue
key = CryptoUtil.Encrypt(key)
'get value
Dim value As String
value = GetCookieValue(key)
'decrypt value
value = CryptoUtil.Decrypt(value)
Return value
End Function
Public Shared Function GetCookie(ByVal key As String) As HttpCookie
'encode key for retrieval
key = HttpContext.Current.Server.UrlEncode(key)
Return HttpContext.Current.Request.Cookies.Get(key)
End Function
Public Shared Function GetCookieValue(ByVal key As String) As String
Try
'don't encode key for retrieval here
'done in the GetCookie function
'get value
Dim value As String
value = GetCookie(key).Value
'decode stored value
value = HttpContext.Current.Server.UrlDecode(value)
Return value
Catch
End Try
End Function
End Class
You'll notice most of the set functions are overloaded to provide an addition parameter for a cookie expiration date. Not setting the expiration will keep the cookie only for the browser session in memory. To set a permanent cookie, set an expiration date for a point in the future.
Also, note that the encryption functions handle the encryption of both the data and the key. It is important to encrypt the key as well since that can expose information about the nature of the data. For instance, if your key was "UserID", then it might be safe to assume that your encrypted value is a numeric string, giving an attacker an advantage.
Encoding Cookies
Note that our standard cookie functions encode and decode the keys and values of the cookies. The reason for this is that cookies fall under the same restrictions as URLs. Specifically, the characters '=' and ';' are reserved and must be escaped; this is especially important when saving encrypted data because the encryption algorithm will append "=" to fill the block with the allocated block size.
The Sample Project
Our sample project is actually two projects: EncryptingCookies (view demo) and Plourdenet.Com.WebTools. EncryptingCookies is the Web-application project that contains our Web forms and utilizes the utility classes. Plourdenet.Com.WebTools is a class library project housing the utility classes. Placing the utility classes in a separate project makes it easy for us to eventually deploy the assembly to be shared with multiple Web projects.
Figure #2 - Solution Explorer for the Sample Projects
There are two thing to remember when setting up a structure like this. First, you must add a reference to System.Web in your class library. Second, you must add a reference to your utility project in your Web application. In addition, all the code that references the utility project should provide an Imports statement as such:
Imports Plourdenet.Com.WebTools
Creating Web Forms To Set Cookies
In our sample application, I have two forms. The first (and the default form) is SetCookies.aspx, and the second is GetCookies.aspx
SetCookies.aspx Web Form
The set cookies form is quite simple. We have a single text box and a button to post the value back to the server.
Figure #3 - The SetCookies.aspx Web Form
When the Save Cookie button is clicked, the form returns to the server and initiates the following server-side event:
Protected Const COOKIE_KEYNAME = "MyKey"
Private Sub btnSaveCookie_Click(ByVal sender As System.Object, _
ByVal e As System.EventArgs) Handles btnSaveCookie.Click
CookieUtil.SetCookie(COOKIE_KEYNAME, _
txtCookieValue.Text, Now.AddDays(30))
CookieUtil.SetEncryptedCookie(COOKIE_KEYNAME, _
txtCookieValue.Text, Now.AddDays(30))
CookieUtil.SetTripleDESEncryptedCookie(COOKIE_KEYNAME, _
txtCookieValue.Text, Now.AddDays(30))
Response.Redirect("GetCookies.aspx")
End Sub
Using a constant for the cookie key name and the value submitted in the text box, we set three cookies. First, a standard unencrypted cookie. Second, a cookie encrypted with DES, and third, a cookie encrypted with Triple DES.
GetCookies.aspx Web Form
The Get Cookies Web Form is doing a little more work behind the scene to show you what happens to your cookie data.
Figure #4 - The GetCookies.aspx Web Form
In the Page_Load event, we retrieve the cookie data using our CookieUtil accessor functions. Then, finally we dump out the contents of the entire cookie collection, just to prove there was no funny business.
Protected Const COOKIE_KEYNAME = "MyKey"
Private Sub Page_Load(ByVal sender As System.Object, _
ByVal e As System.EventArgs) Handles MyBase.Load
'Put user code to initialize the page here
Dim DESCookieKey As String = CryptoUtil.Encrypt(COOKIE_KEYNAME)
Dim TripleDESCookieKey As String = _
CryptoUtil.EncryptTripleDES(COOKIE_KEYNAME)
lblCookieName.Text = COOKIE_KEYNAME
lblStandardCookieValue.Text = _
CookieUtil.GetCookieValue(COOKIE_KEYNAME)
lblDESEncryptedValue.Text = _
CookieUtil.GetCookieValue(DESCookieKey)
lblDESDecryptedValue.Text = _
CookieUtil.GetEncryptedCookieValue(COOKIE_KEYNAME)
lblTripleDESEncryptedValue.Text = _
CookieUtil.GetCookieValue(TripleDESCookieKey)
lblTripleDESDecryptedValue.Text = _
CookieUtil.GetTripleDESEncryptedCookieValue(COOKIE_KEYNAME)
'Start Cookie Dump
Dim cookie As HttpCookie
Dim key As String
lblAllCookies.Text = _
"" & vbCrLf
" & vbCrLf
End Sub
Cautions about Cookies
So there you have it - a fairly simple yet powerful way to encrypt your cookie data. But before I leave you, I want to review a few issues to watch out for when using cookies.
* Your entire cookie collection is limited to 4 kilobytes in size. This includes key, the space for key names, and other related data.
* The size of your cookie data will increase when encrypted. Make sure you do not run over the limit.
* Cookies are sent to the server every time a request is made to the server. Therefore, if you are lugging large cookies back and forth, you are using additional bandwidth and server processing resources.
* Encrypting large amounts of data can impact application performance.
* Any initial values supplied by your user cannot be encrypted unless you use SSL on your site. For instance, in our sample set cookies form, the initial value was passed in the clear to the server.
* Cookies can be blocked or deleted at anytime by your users. If the use of cookies is critical to the operation of your application, you may need to find ways to work around users that can't or won't permit them.
Good Luck! And let me know when you have baked your first batch of encrypted cookies.
Cookies can provide a real convenience to both visitors and programmers of a Web-based application. However, cookies are problematic from a security point of view for two reasons. First, unless your site uses SSL, cookie data is passed in the clear in the header of both the HTTP request and response. That means anyone who is clever enough to sniff packets on a particular port of a particular IP address can read cookie data as plain as day. The second problem is that cookie data is stored in nice little unrestricted cookie files in a browser's cache directory. This means that anyone that has access to your hard drive can see and open your cookies. Figure #1 shows an example of the contents of a cookie file.
So when your 16 year old finds this "convenient" data and forges off to rack up thousands of dollars in charges on www.HottiesBareAll.com, it will suddenly become clear why cookie security is important.
If you have never seen the voluminous quantity of cookie data on your machine, try the following. Open Internet Explorer, select Tools and then Internet Options from the menu. From the Internet Options dialog click the Settings button. Then on the Settings dialog click View Files. An Explorer window will display all the cached data your browser has kindly filled your hard drive with. Sort the list alphabetically, then scroll down to the Cs. (C is for "Cookie" :)) On my machine, there are currently 1,850 cookie files.
So, here is some advice - don't store sensitive data about users in cookies. If you must, then you have a responsibility to protect that data through encryption.
In previous versions of ASP, you would have been forced to purchase third party components to handle this encryption, or, if you are a genius, you could have ventured off and created your own components. However, most of us resorted to simple techniques that shift the ASCII values of each character in a string, like Rot13. Unfortunately, these techniques are more than obvious to people that are clever enough to sniff packets in the first place.
Fortunately, we no longer have to implement our own feeble security algorithms since the .NET Framework provides us with a slew of encryption classes in the System.Security.Cryptography namespace. Take a look for yourself.
http://msdn.microsoft.com/library/en-us/cpref/html/frlrfsystemsecuritycryptography.asp?frame=true
Overview of Cryptography in .NET
First, let's just acknowledge that encryption is really complicated. Frankly, it's supposed to be complicated because that is what makes it secure. And, by the way, I want to state here that I am in no way an encryption expert. There are probably only a handful of people that fully understand the intricacies of the math involved, and half of them probably wrote the cryptography classes for the .NET Framework.
Fortunately, we don't have to understand the intricacies to take advantage of encryption because the .NET Framework gives us a simple way to access the power of the best and most secure algorithms.
Before we begin encrypting our cookie data, we should have a little discussion about the cryptography classes and which ones are appropriate for securing our cookies.
What Is Encryption Exactly?
In the simplest terms, encryption is the process of taking a target string of characters (bytes, more specifically) and converting it into another string of characters so that by examination, the original characters cannot be deciphered. This process is performed with a second string of characters known as a "key". In technical terms, this key is mathematically "mashed" into the original string over many complex and compounded iterations. In addition, sometimes another string of characters, known as an "initialization vector", is "mangled" into the target string before the key is mashed. This helps to prevent obvious patterns in the target string from being revealed by mashing alone. Of course, the mashing and mangling is not permanent. If the key and the initialization vector remain intact, then the algorithms can use them in reverse to unmangle and unmash the original data.
The effectiveness or "strength" of the encryption is determined by the size of the key used. The larger the key, the stronger the encryption. Typical key sizes are 64 bit (8 bytes), 128 bit (16 bytes), 192 bit (24 bytes), 256 bit (32 bytes) and 512 bit (64 bytes). The only way to crack most of these algorithms is by sheer brute force, where an attacker creates a program to test every single possible key combination. For even the 64-bit option, there are 72,057,594,037,927,936 possible combinations (2^56 - 8 bits are held for parity). So basically, unless you have a very powerful computer, you are going to be waiting awhile to crack even the weakest key.
Cryptography Patterns
There are two basic approaches for handling data encryption: symmetric (or private key) and asymmetric (or public key). In symmetric cryptography techniques, both sides of the data exchange (the encryptor and decryptor) must have access to a single secret private key.
In asymmetric encryption, one side (the decryptor) requests a public key from the encryptor. The encryptor creates a public key and sends it to the requestor. Then the encryptor uses the public key to create a second unique private key that it holds on to. This new private key is used to encrypt the message sent to the decryptor, who then uses the public key to decrypt the message. If encrypted data must be sent in the other direction then the other side will create a new public key and sends it along in a reciprocal fashion. This asymmetric technique is used by SSL to secure HTTP transmissions.
For our cookie encryption purposes, we will use the symmetric approach since both the encryption and decryption will take place in the same application on the server; therefore, we only need one private key that we will keep secure in the compiled code of our cryptographic utility class.
Cryptographic Service Providers
The .NET Framework provides 4 cryptographic algorithms that extend from the base SymmetricAlgorithm class:
* System.Security.Cryptography.DES (Data Encryption Standard)
* System.Security.Cryptography.TripleDES (Triple Data Encryption Standard)
* System.Security.Cryptography.RC2
* System.Security.Cryptography.Rijndael
In our example project, we will demonstrate both the DES and TripleDES algorithms. Each of these algorithms is accessed through wrapper classes categorized as Cryptographic Service Providers (CSP).
All CSP objects have two important methods: CreateEncryptor & CreateDecryptor. Each method has two parameters for our private key and initialization vector. Each method returns an algorithm object with the ICryptoTransform interface. This object will be used by the CryptoStream object(which we will discuss in a minute.)
For more a in-depth discussion of Cryptography in .NET, visit the following link in the MSDN Library:
http://msdn.microsoft.com/library/en-us/cpguide/html/cpconcryptographyoverview.asp?frame=true
Key Size Considerations
DES is one of the weaker encryption methods because its key size is limited to 64 bits. However, for our cookie purposes, this level of encryption is probably sufficient. TripleDES, which, believe it or not, performs the encryption three times, also has a larger key size. The length of the key must be either 128 or 192 bits - two to three times larger. TripleDES is significantly more secure.
Deciding which algorithm to use should not only be based on your desire for stronger encryption but also by the size of the cookies you require. You will notice in our example application that encrypted data will grow in size. And of course, the larger the key, the larger the resulting data. This is an important consideration since cookie data is restricted to 4kb.
An alternative is to store data that you only need to persist temporarily in hidden input tags. Of course, this is exactly what ViewState does in ASP.NET. In addition, ViewState offers some built-in encryption. The ViewState of a Web form, by default, uses hash functions from some of the asymmetric algorithms to garble the content. This is not fully secure. However, you can configure your ASP.NET application or individual pages to use more secure encryption on the ViewState - specifying the same TripleDES algorithm we discussed earlier. Here is an article on MSDN on how to do just that:
http://msdn.microsoft.com/library/en-us/dnaspnet/html/asp11222001.asp?frame=true
Of course, if you are carrying that much data around in cookies, you really should reconsider you Web-application design. Remember, each request made of the server will need to pass this cookie blob back, unnecessarily chewing up bandwidth.
Finally, encryption is a processor intensive activity. The more data you are encrypting/decrypting or the stronger your algorithm, the more server resources you will require, potentially slowing down the entire site.
The CryptoStream Object
One of the things you may find hard to understand at first is that all encryption and decryption in .NET is handled through the CryptoStream object. I know you are thinking that all we need to do is convert a few strings. Why do we need to mess with complicated streams. Well, from the broader scope of cryptographic issues and from the design emphasis of the .NET Framework, using streams really makes sense. Nearly all access (IO) to external resources handled by the .NET Framework is done through the use of streams. While it is not in the System.IO namespace, the CryptoStream object inherits from the System.IO.Stream object.
The major advantage of using streams is that they can be chained together. This is particularly useful when performing file operations or accessing other network services. For instance, you can open a socket to a network service and stream data that is simultaneously being encrypted. The following link provides an example of DES provider encrypting a file through streams.
http://msdn.microsoft.com/library/en-us/cpref/html/frlrfSystemSecurityCryptographyDESClassTopic.asp?frame=true
So, in order to work with strings as a stream, we need to utilize a special class called a MemoryStream. This will allow us to handle strings as streams and flow them through the CryptoStream for processing.
Creating a Simple Cryptography Utility Class
Well, you have all been waiting patiently, so here is the code for our CryptoUtil class. As with many utility functions, these don't require state so all our methods are shared (static).
Imports System.Diagnostics
Imports System.Security.Cryptography
Imports System.Text
Imports System.IO
Public Class CryptoUtil
'8 bytes randomly selected for both the Key and the Initialization Vector
'the IV is used to encrypt the first block of text so that any repetitive
'patterns are not apparent
Private Shared KEY_64() As Byte = {42, 16, 93, 156, 78, 4, 218, 32}
Private Shared IV_64() As Byte = {55, 103, 246, 79, 36, 99, 167, 3}
'24 byte or 192 bit key and IV for TripleDES
Private Shared KEY_192() As Byte = {42, 16, 93, 156, 78, 4, 218, 32, _
15, 167, 44, 80, 26, 250, 155, 112, _
2, 94, 11, 204, 119, 35, 184, 197}
Private Shared IV_192() As Byte = {55, 103, 246, 79, 36, 99, 167, 3, _
42, 5, 62, 83, 184, 7, 209, 13, _
145, 23, 200, 58, 173, 10, 121, 222}
'Standard DES encryption
Public Shared Function Encrypt(ByVal value As String) As String
If value <> "" Then
Dim cryptoProvider As DESCryptoServiceProvider = _
New DESCryptoServiceProvider()
Dim ms As MemoryStream = New MemoryStream()
Dim cs As CryptoStream = _
New CryptoStream(ms, cryptoProvider.CreateEncryptor(KEY_64, IV_64), _
CryptoStreamMode.Write)
Dim sw As StreamWriter = New StreamWriter(cs)
sw.Write(value)
sw.Flush()
cs.FlushFinalBlock()
ms.Flush()
'convert back to a string
Return Convert.ToBase64String(ms.GetBuffer(), 0, ms.Length)
End If
End Function
'Standard DES decryption
Public Shared Function Decrypt(ByVal value As String) As String
If value <> "" Then
Dim cryptoProvider As DESCryptoServiceProvider = _
New DESCryptoServiceProvider()
'convert from string to byte array
Dim buffer As Byte() = Convert.FromBase64String(value)
Dim ms As MemoryStream = New MemoryStream(buffer)
Dim cs As CryptoStream = _
New CryptoStream(ms, cryptoProvider.CreateDecryptor(KEY_64, IV_64), _
CryptoStreamMode.Read)
Dim sr As StreamReader = New StreamReader(cs)
Return sr.ReadToEnd()
End If
End Function
'TRIPLE DES encryption
Public Shared Function EncryptTripleDES(ByVal value As String) As String
If value <> "" Then
Dim cryptoProvider As TripleDESCryptoServiceProvider = _
New TripleDESCryptoServiceProvider()
Dim ms As MemoryStream = New MemoryStream()
Dim cs As CryptoStream = _
New CryptoStream(ms, cryptoProvider.CreateEncryptor(KEY_192, IV_192), _
CryptoStreamMode.Write)
Dim sw As StreamWriter = New StreamWriter(cs)
sw.Write(value)
sw.Flush()
cs.FlushFinalBlock()
ms.Flush()
'convert back to a string
Return Convert.ToBase64String(ms.GetBuffer(), 0, ms.Length)
End If
End Function
'TRIPLE DES decryption
Public Shared Function DecryptTripleDES(ByVal value As String) As String
If value <> "" Then
Dim cryptoProvider As TripleDESCryptoServiceProvider = _
New TripleDESCryptoServiceProvider()
'convert from string to byte array
Dim buffer As Byte() = Convert.FromBase64String(value)
Dim ms As MemoryStream = New MemoryStream(buffer)
Dim cs As CryptoStream = _
New CryptoStream(ms, cryptoProvider.CreateDecryptor(KEY_192, IV_192), _
CryptoStreamMode.Read)
Dim sr As StreamReader = New StreamReader(cs)
Return sr.ReadToEnd()
End If
End Function
End Class
Note that our keys are initialized at the top as an array of bytes. Also, note that I am using numeric constants in these arrays. If you choose to do the same, be sure to keep the values greater than or equal to zero and less than or equal to 255. This is the allowable range for a byte value.
In the class, we have 2 pairs of functions for encrypting and decrypting under both the DES and TripleDES providers. On the encrypt functions, the final byte array in the Memory Stream buffer is converted back to a string using the ToBase64String function. The reverse is done on the decrypt functions with the FromBase64String function.
Creating a Cookie Utility Class
Our next step is to create a simple class for setting and retrieving either plain cookies or those with encryption on top. Again we use series of shared methods to simplify the setting and getting of cookie data, allowing you to handle cookie data with one line of code.
Imports System.Web
Public Class CookieUtil
'SET COOKIE FUNCTIONS *****************************************************
'SetTripleDESEncryptedCookie - key & value only
Public Shared Sub SetTripleDESEncryptedCookie(ByVal key As String, _
ByVal value As String)
'Convert parts
key = CryptoUtil.EncryptTripleDES(key)
value = CryptoUtil.EncryptTripleDES(value)
SetCookie(key, value)
End Sub
'SetTripleDESEncryptedCookie - overloaded method with expires parameter
Public Shared Sub SetTripleDESEncryptedCookie(ByVal key As String, _
ByVal value As String, ByVal expires As Date)
'Convert parts
key = CryptoUtil.EncryptTripleDES(key)
value = CryptoUtil.EncryptTripleDES(value)
SetCookie(key, value, expires)
End Sub
'SetEncryptedCookie - key & value only
Public Shared Sub SetEncryptedCookie(ByVal key As String, _
ByVal value As String)
'Convert parts
key = CryptoUtil.Encrypt(key)
value = CryptoUtil.Encrypt(value)
SetCookie(key, value)
End Sub
'SetEncryptedCookie - overloaded method with expires parameter
Public Shared Sub SetEncryptedCookie(ByVal key As String, _
ByVal value As String, ByVal expires As Date)
'Convert parts
key = CryptoUtil.Encrypt(key)
value = CryptoUtil.Encrypt(value)
SetCookie(key, value, expires)
End Sub
'SetCookie - key & value only
Public Shared Sub SetCookie(ByVal key As String, ByVal value As String)
'Encode Part
key = HttpContext.Current.Server.UrlEncode(key)
value = HttpContext.Current.Server.UrlEncode(value)
Dim cookie As HttpCookie
cookie = New HttpCookie(key, value)
SetCookie(cookie)
End Sub
'SetCookie - overloaded with expires parameter
Public Shared Sub SetCookie(ByVal key As String, _
ByVal value As String, ByVal expires As Date)
'Encode Parts
key = HttpContext.Current.Server.UrlEncode(key)
value = HttpContext.Current.Server.UrlEncode(value)
Dim cookie As HttpCookie
cookie = New HttpCookie(key, value)
cookie.Expires = expires
SetCookie(cookie)
End Sub
'SetCookie - HttpCookie only
'final step to set the cookie to the response clause
Public Shared Sub SetCookie(ByVal cookie As HttpCookie)
HttpContext.Current.Response.Cookies.Set(cookie)
End Sub
'GET COOKIE FUNCTIONS *****************************************************
Public Shared Function GetTripleDESEncryptedCookieValue(ByVal key As String) _ As String
'encrypt key only - encoding done in GetCookieValue
key = CryptoUtil.EncryptTripleDES(key)
'get value
Dim value As String
value = GetCookieValue(key)
'decrypt value
value = CryptoUtil.DecryptTripleDES(value)
Return value
End Function
Public Shared Function GetEncryptedCookieValue(ByVal key As String) As String
'encrypt key only - encoding done in GetCookieValue
key = CryptoUtil.Encrypt(key)
'get value
Dim value As String
value = GetCookieValue(key)
'decrypt value
value = CryptoUtil.Decrypt(value)
Return value
End Function
Public Shared Function GetCookie(ByVal key As String) As HttpCookie
'encode key for retrieval
key = HttpContext.Current.Server.UrlEncode(key)
Return HttpContext.Current.Request.Cookies.Get(key)
End Function
Public Shared Function GetCookieValue(ByVal key As String) As String
Try
'don't encode key for retrieval here
'done in the GetCookie function
'get value
Dim value As String
value = GetCookie(key).Value
'decode stored value
value = HttpContext.Current.Server.UrlDecode(value)
Return value
Catch
End Try
End Function
End Class
You'll notice most of the set functions are overloaded to provide an addition parameter for a cookie expiration date. Not setting the expiration will keep the cookie only for the browser session in memory. To set a permanent cookie, set an expiration date for a point in the future.
Also, note that the encryption functions handle the encryption of both the data and the key. It is important to encrypt the key as well since that can expose information about the nature of the data. For instance, if your key was "UserID", then it might be safe to assume that your encrypted value is a numeric string, giving an attacker an advantage.
Encoding Cookies
Note that our standard cookie functions encode and decode the keys and values of the cookies. The reason for this is that cookies fall under the same restrictions as URLs. Specifically, the characters '=' and ';' are reserved and must be escaped; this is especially important when saving encrypted data because the encryption algorithm will append "=" to fill the block with the allocated block size.
The Sample Project
Our sample project is actually two projects: EncryptingCookies (view demo) and Plourdenet.Com.WebTools. EncryptingCookies is the Web-application project that contains our Web forms and utilizes the utility classes. Plourdenet.Com.WebTools is a class library project housing the utility classes. Placing the utility classes in a separate project makes it easy for us to eventually deploy the assembly to be shared with multiple Web projects.
Figure #2 - Solution Explorer for the Sample Projects
There are two thing to remember when setting up a structure like this. First, you must add a reference to System.Web in your class library. Second, you must add a reference to your utility project in your Web application. In addition, all the code that references the utility project should provide an Imports statement as such:
Imports Plourdenet.Com.WebTools
Creating Web Forms To Set Cookies
In our sample application, I have two forms. The first (and the default form) is SetCookies.aspx, and the second is GetCookies.aspx
SetCookies.aspx Web Form
The set cookies form is quite simple. We have a single text box and a button to post the value back to the server.
Figure #3 - The SetCookies.aspx Web Form
When the Save Cookie button is clicked, the form returns to the server and initiates the following server-side event:
Protected Const COOKIE_KEYNAME = "MyKey"
Private Sub btnSaveCookie_Click(ByVal sender As System.Object, _
ByVal e As System.EventArgs) Handles btnSaveCookie.Click
CookieUtil.SetCookie(COOKIE_KEYNAME, _
txtCookieValue.Text, Now.AddDays(30))
CookieUtil.SetEncryptedCookie(COOKIE_KEYNAME, _
txtCookieValue.Text, Now.AddDays(30))
CookieUtil.SetTripleDESEncryptedCookie(COOKIE_KEYNAME, _
txtCookieValue.Text, Now.AddDays(30))
Response.Redirect("GetCookies.aspx")
End Sub
Using a constant for the cookie key name and the value submitted in the text box, we set three cookies. First, a standard unencrypted cookie. Second, a cookie encrypted with DES, and third, a cookie encrypted with Triple DES.
GetCookies.aspx Web Form
The Get Cookies Web Form is doing a little more work behind the scene to show you what happens to your cookie data.
Figure #4 - The GetCookies.aspx Web Form
In the Page_Load event, we retrieve the cookie data using our CookieUtil accessor functions. Then, finally we dump out the contents of the entire cookie collection, just to prove there was no funny business.
Protected Const COOKIE_KEYNAME = "MyKey"
Private Sub Page_Load(ByVal sender As System.Object, _
ByVal e As System.EventArgs) Handles MyBase.Load
'Put user code to initialize the page here
Dim DESCookieKey As String = CryptoUtil.Encrypt(COOKIE_KEYNAME)
Dim TripleDESCookieKey As String = _
CryptoUtil.EncryptTripleDES(COOKIE_KEYNAME)
lblCookieName.Text = COOKIE_KEYNAME
lblStandardCookieValue.Text = _
CookieUtil.GetCookieValue(COOKIE_KEYNAME)
lblDESEncryptedValue.Text = _
CookieUtil.GetCookieValue(DESCookieKey)
lblDESDecryptedValue.Text = _
CookieUtil.GetEncryptedCookieValue(COOKIE_KEYNAME)
lblTripleDESEncryptedValue.Text = _
CookieUtil.GetCookieValue(TripleDESCookieKey)
lblTripleDESDecryptedValue.Text = _
CookieUtil.GetTripleDESEncryptedCookieValue(COOKIE_KEYNAME)
'Start Cookie Dump
Dim cookie As HttpCookie
Dim key As String
lblAllCookies.Text = _
"
End Sub
Cautions about Cookies
So there you have it - a fairly simple yet powerful way to encrypt your cookie data. But before I leave you, I want to review a few issues to watch out for when using cookies.
* Your entire cookie collection is limited to 4 kilobytes in size. This includes key, the space for key names, and other related data.
* The size of your cookie data will increase when encrypted. Make sure you do not run over the limit.
* Cookies are sent to the server every time a request is made to the server. Therefore, if you are lugging large cookies back and forth, you are using additional bandwidth and server processing resources.
* Encrypting large amounts of data can impact application performance.
* Any initial values supplied by your user cannot be encrypted unless you use SSL on your site. For instance, in our sample set cookies form, the initial value was passed in the clear to the server.
* Cookies can be blocked or deleted at anytime by your users. If the use of cookies is critical to the operation of your application, you may need to find ways to work around users that can't or won't permit them.
Good Luck! And let me know when you have baked your first batch of encrypted cookies.
radio button inside datagrid
Using Radio buttons to select each row in datagrid
=====================================
Using ASP.net to handle radio button would be slow or very slow if datagrid has much data to display because ASP .net triggers "evey" event of any server side control by reloaing the page while posting some data back to it, which definitely reduce performance.So I suggest you to choose javascript for this in collaboration with ASP .net, infact ASP .net translates most of its commands into javascript.To have radio buttons to select each row inside the datagrid follow the following easy steps (100% tested, if found any problem post here):
.ASPX File:
========
In aspx page add the following javascript function
Your Radio Button ASP .net Control inside the data grid would look like this:
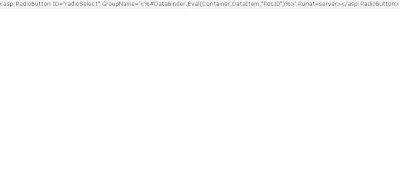
Here I used GroupName property to just Identify the row no in Database, where datagrid is bound to any datasource in page load event. RecID in this case is the Primary Key in the table holding unique RecID for each row in the table. You can replace this with your table's field name, or remove it at all if you donot want to record the row number for each radio button. You can also use the Text property to set text for the radio button.Thats all concerned in aspx page.
.CS File
======
Here Make the following function and call it in Page Load event, this function would set the OnClick event of each RadioButton inside the data grid, let say your data grid name is "grdDataGrid":
public void SetGrdRadiosOnClick()
{
int i;
RadioButton B;
for (i = 0; i
B.Attributes.Add("OnClick", "SelectMeOnly(" + B.ClientID + ", "+ "'grdDataGrid'" + ")");
}
}
You got it, Thats all it need to have radio button functionality to select rows in Datagrid and in fastest way.Further, if you want to get which radio is selected and at which row then you cn use the following function, let say you have a button name "btnSelect" outside the datagrid to process the selected row in datagrid. (Remember we set the Unique Row ID of database in GroupName property of each radio button):GridName is "grdDataGrid"RadioButton inside the grid was "radioSelect" which is repeated for each rowpublic
void btnSelect_Click(object sender, System.EventArgs e)
{
RadioButton B;
int i, RecID=0;
for (i = 0; i
{
B = (RadioButton) grdDataGrid.Items[i].FindControl("radioSelect");
if (B.Checked) RecID = int.Parse(B.GroupName);
}
Response.Redirect("./ProcessRecord.aspx?RecID=" + RecID);
}
God Bless You.
Monday, February 4, 2008
Sending Email in ASP.NET 2.0
Introduction
A lot of times, we are facing some issues when sending email through the mailserver. Especially if we host our websites in shared hosting and the mail will never get to the recipient. There are lots of reason for this to happen. In this article I would like to explain how to Send Email using .NET 2.0 Framework and how to troubleshoot your code if your email never reach the recipient. This article will only cover sending Email using ASP.NET 2.0 and will not work in ASP.NET 1.0.
Microsoft has improved the SMTP library in their .NET Framework 2.0 and therefore the code you find in this article will not work in .NET 1.0.
Main
Sending Email in .NET 2.0 is quite easy and straight forward and you can send Email with just five lines of code. In .NET 2.0, Sending Email library in ASP.NET 2.0 is called System.Net.Mail.SmtpClient library. Therefore your code need to Import System.Net.Mail or Using System.Net.Mail
in your code
Before you use the code below, please make sure that you know the ipaddress or the hostname of your mailserver. You can actually detect if the ipaddress of your mailserver is infact a mailserver by using telnet command.
In command prompt, type telnet ipaddress 25.
If you got replied from the telnet command, then the Ipaddress of your mail server has the SMTP Service started, and if not, then you cannot use the Mail Server to send email. SMTP Server is listening on port 25 and therefore you need to be able to telnet in before you can send email.
Basic Sample Code to Send Text Email in ASP.NET 2.0
C#
SmtpClient smtpClient = new SmtpClient("IPaddress");
MailMessage message = new MailMessage("sender@sender.com", "rcpt@recipient.com");
message.Subject = "Subject Email";
message.Body = "Body Email";
smtpClient.Send(message);
VB.NET
Dim message As New MailMessage("sender@sender.com", "rcpt@recipient.com")
Dim SmtpClient As New SmtpClient("ipaddress")
message.Subject = "Subject Email"
message.Body = "Body Email"
SmtpClient.Send(message)
As you can see that you only need 5 lines of code to send email. And thats all you need. However the code above will not work if your SMTP server is configured with authentication. Lots of mailserver these days has been configured with SMTP authentication to prevent spam and abuse. SMTP Authentication means that before you can send email against the mailserver, you need to provide your login id and password. This is to prevent spam and abuse from unauthorized users. The login ID and password will normally be your email user and password or your NT Login. You need to check with your MailServer administration for further information about this.
Basic Sample Code on Sending HTML Email in ASP.NET 2.0
C#
SmtpClient smtpClient = new SmtpClient("IPaddress");
MailMessage message = new MailMessage("sender@sender.com", "rcpt@recipient.com");
message.Subject = "Subject Email";
message.Body = "<H2>Testing HTML Email
";
message.IsBodyHtml = true;
smtpClient.Send(message);
VB.NET
Dim message As New MailMessage("sender@sender.com", "rcpt@recipient.com")
Dim SmtpClient As New SmtpClient("ipaddress")
message.Subject = "Subject Email"
message.Body = "
message.IsBodyHtml = True
SmtpClient.Send(message)
As you can see that Sending HTML email from .NET framework is very easy. You just need to set the property IsBodyHtml = true and you are done!.
Basic Sample Code on Sending Email using Attachment
C#
message.Attachments.Add(new Attachment(@"C:\Data.txt"));
VB.NET
message.Attachments.Add(new Attachment("C:\Data.txt"))
For including attachments in your email, you just need to include the attachments in your MailMessage object. Adding above code to the previous code will allow you to send attachment email.
Sending Email through SMTP Authentication
If using above sample code doesn't let you send email, then you might need to try sending email using SMTP Authentication.
Basic Sample Code on Sending Email using SMTP Authentication
VB.NET
Dim message As New MailMessage("sender@sender.com", "rcpt@recipient.com")
Dim SmtpClient As New SmtpClient("IPAddress")
message.Subject = "Subject Email"
message.Body = "
message.IsBodyHtml = True
SmtpClient.Credentials = new NetworkCredentials("sender@sender.com","password")
SmtpClient.Send(message)C#
SmtpClient smtpClient = new SmtpClient("IPaddress");
MailMessage message = new MailMessage("sender@sender.com", "rcpt@recipient.com");
message.Subject = "Subject Email";
message.Body = "<H2>Testing HTML Email
";
message.IsBodyHtml = true;
smtpClient.Credentials = new NetworkCredentials("sender@sender.com","password");
smtpClient.Send(message);
As you can see from the code above, you need to pass your email username and password before you can send email. Please note that the email username and password must belong to the mailserver or else it will reject if the mailserver couldn't validate the logon details.
Troubleshooting System.Net.Mail
Few tips and tricks for you to troubleshoot if you email never arrived to the destination
Check if the SMTP Server is listening on port 25 (telnet ipaddress 25)
Check if your Mailserver ip is being blacklisted (http://mxtoolbox.com/blacklists.aspx)
Check if your SMTP Server is being configured using SMTP Authentication.
If using SMTP Authentication, then check if your username and password is correct.
You can try login using the username and password using outlook and try to send email from outlook. Remember to check using SMTP Authentication is your outlook settings.
Conclusion
Sending Email in ASP.NET 2.0 is extremely easy and straight forward. Thanks to Microsoft Team that has made this library very easy to use. Feel free to add any comments to my article and Happy Programming !
A lot of times, we are facing some issues when sending email through the mailserver. Especially if we host our websites in shared hosting and the mail will never get to the recipient. There are lots of reason for this to happen. In this article I would like to explain how to Send Email using .NET 2.0 Framework and how to troubleshoot your code if your email never reach the recipient. This article will only cover sending Email using ASP.NET 2.0 and will not work in ASP.NET 1.0.
Microsoft has improved the SMTP library in their .NET Framework 2.0 and therefore the code you find in this article will not work in .NET 1.0.
Main
Sending Email in .NET 2.0 is quite easy and straight forward and you can send Email with just five lines of code. In .NET 2.0, Sending Email library in ASP.NET 2.0 is called System.Net.Mail.SmtpClient library. Therefore your code need to Import System.Net.Mail or Using System.Net.Mail
in your code
Before you use the code below, please make sure that you know the ipaddress or the hostname of your mailserver. You can actually detect if the ipaddress of your mailserver is infact a mailserver by using telnet command.
In command prompt, type telnet ipaddress 25.
If you got replied from the telnet command, then the Ipaddress of your mail server has the SMTP Service started, and if not, then you cannot use the Mail Server to send email. SMTP Server is listening on port 25 and therefore you need to be able to telnet in before you can send email.
Basic Sample Code to Send Text Email in ASP.NET 2.0
C#
SmtpClient smtpClient = new SmtpClient("IPaddress");
MailMessage message = new MailMessage("sender@sender.com", "rcpt@recipient.com");
message.Subject = "Subject Email";
message.Body = "Body Email";
smtpClient.Send(message);
VB.NET
Dim message As New MailMessage("sender@sender.com", "rcpt@recipient.com")
Dim SmtpClient As New SmtpClient("ipaddress")
message.Subject = "Subject Email"
message.Body = "Body Email"
SmtpClient.Send(message)
As you can see that you only need 5 lines of code to send email. And thats all you need. However the code above will not work if your SMTP server is configured with authentication. Lots of mailserver these days has been configured with SMTP authentication to prevent spam and abuse. SMTP Authentication means that before you can send email against the mailserver, you need to provide your login id and password. This is to prevent spam and abuse from unauthorized users. The login ID and password will normally be your email user and password or your NT Login. You need to check with your MailServer administration for further information about this.
Basic Sample Code on Sending HTML Email in ASP.NET 2.0
C#
SmtpClient smtpClient = new SmtpClient("IPaddress");
MailMessage message = new MailMessage("sender@sender.com", "rcpt@recipient.com");
message.Subject = "Subject Email";
message.Body = "<H2>Testing HTML Email
";
message.IsBodyHtml = true;
smtpClient.Send(message);
VB.NET
Dim message As New MailMessage("sender@sender.com", "rcpt@recipient.com")
Dim SmtpClient As New SmtpClient("ipaddress")
message.Subject = "Subject Email"
message.Body = "
Testing HTML Email
"message.IsBodyHtml = True
SmtpClient.Send(message)
As you can see that Sending HTML email from .NET framework is very easy. You just need to set the property IsBodyHtml = true and you are done!.
Basic Sample Code on Sending Email using Attachment
C#
message.Attachments.Add(new Attachment(@"C:\Data.txt"));
VB.NET
message.Attachments.Add(new Attachment("C:\Data.txt"))
For including attachments in your email, you just need to include the attachments in your MailMessage object. Adding above code to the previous code will allow you to send attachment email.
Sending Email through SMTP Authentication
If using above sample code doesn't let you send email, then you might need to try sending email using SMTP Authentication.
Basic Sample Code on Sending Email using SMTP Authentication
VB.NET
Dim message As New MailMessage("sender@sender.com", "rcpt@recipient.com")
Dim SmtpClient As New SmtpClient("IPAddress")
message.Subject = "Subject Email"
message.Body = "
Testing HTML Email
"message.IsBodyHtml = True
SmtpClient.Credentials = new NetworkCredentials("sender@sender.com","password")
SmtpClient.Send(message)C#
SmtpClient smtpClient = new SmtpClient("IPaddress");
MailMessage message = new MailMessage("sender@sender.com", "rcpt@recipient.com");
message.Subject = "Subject Email";
message.Body = "<H2>Testing HTML Email
";
message.IsBodyHtml = true;
smtpClient.Credentials = new NetworkCredentials("sender@sender.com","password");
smtpClient.Send(message);
As you can see from the code above, you need to pass your email username and password before you can send email. Please note that the email username and password must belong to the mailserver or else it will reject if the mailserver couldn't validate the logon details.
Troubleshooting System.Net.Mail
Few tips and tricks for you to troubleshoot if you email never arrived to the destination
Check if the SMTP Server is listening on port 25 (telnet ipaddress 25)
Check if your Mailserver ip is being blacklisted (http://mxtoolbox.com/blacklists.aspx)
Check if your SMTP Server is being configured using SMTP Authentication.
If using SMTP Authentication, then check if your username and password is correct.
You can try login using the username and password using outlook and try to send email from outlook. Remember to check using SMTP Authentication is your outlook settings.
Conclusion
Sending Email in ASP.NET 2.0 is extremely easy and straight forward. Thanks to Microsoft Team that has made this library very easy to use. Feel free to add any comments to my article and Happy Programming !
Subscribe to:
Posts (Atom)
